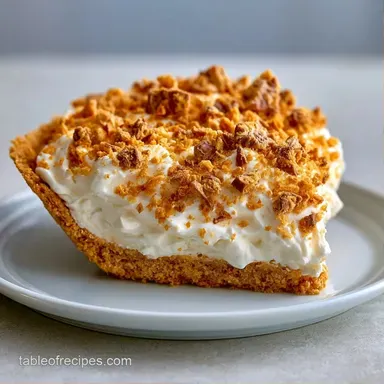
Crunch Butterfinger Ice Cream Dessert with Graham Crust
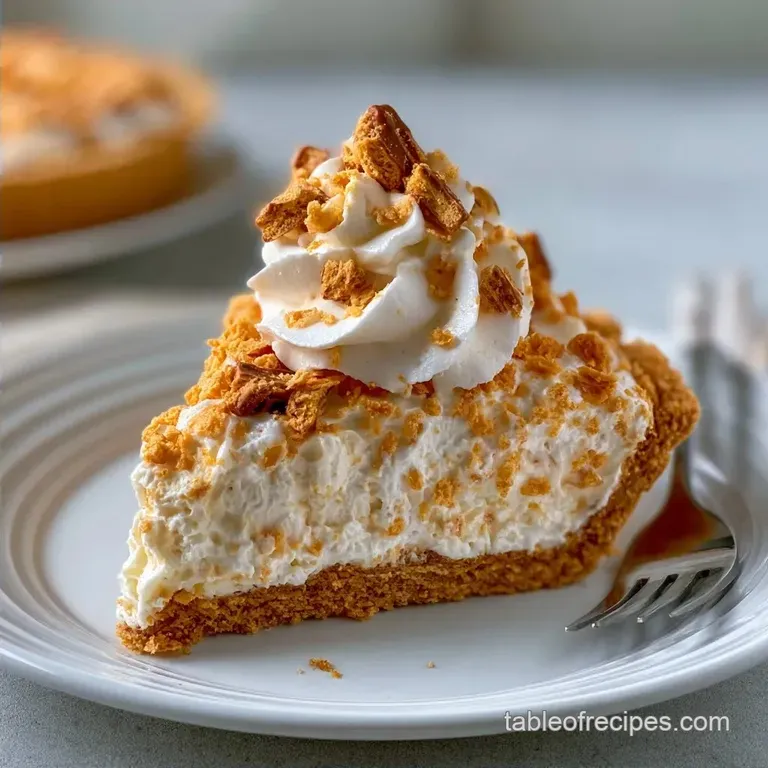
- Time: 15 min active + 6 hrs 15 mins chilling
- Flavor/Texture Hook: Crispy candy fragments in a luxurious frozen cream
- Perfect for: Summer potlucks or family movie nights
- Crunch Butterfinger Ice Cream Dessert Basics
- Why This Texture Works
- The Building Blocks
- Essential Equipment List
- The Cooking Process
- What Makes This So Good
- Fixing Common Problems
- Debunking Frozen Treat Myths
- Storage and Zero Waste
- Creative Dessert Twists
- Serving and Pairing
- Recipe FAQs
- 📝 Recipe Card
Crunch Butterfinger Ice Cream Dessert Basics
The house usually smells like popcorn and melted butter on Friday nights. My kids and I have this ritual where we pick a movie trilogy and lean heavily into snacks. A few years ago, I tried making a custard based frozen treat, but it turned into a grainy, icy block because I over processed the candy.
I realized that for a dessert this heavy on the crunch, you don't want a complex churn. You want something that stays stable and creamy.
The goal here is a high contrast experience. You get the snap of the Butterfinger, the saltiness of the graham cracker base, and a cream that doesn't freeze into a brick. By using a no churn method, we keep the air bubbles intact, which is what gives the dessert its lightness.
Making this Crunch Butterfinger Ice Cream Dessert is more about precision than effort. If you get the whipping stage right, the rest is just layering and waiting. It's the kind of dish that looks like it took hours of work but actually just takes a few minutes of active prep and a lot of freezer space.
Why This Texture Works
- Freezing Point Depression: The high sugar content in sweetened condensed milk lowers the temperature at which the mixture freezes. This prevents large ice crystals from forming, which according to Serious Eats, is what keeps no churn ice creams smooth.
- Air Incorporation: Beating heavy cream creates a foam structure. The fat globules trap air, providing a light mouthfeel that prevents the dessert from feeling like a frozen slab of butter.
| Method | Time | Texture | Best For |
|---|---|---|---|
| No Churn (This) | 15 min active | Light and airy | Quick prep, home kitchens |
| Traditional Churn | 4+ hours | Dense and smooth | Professional finish, purity |
The Building Blocks
| Ingredient | Purpose | Alternative |
|---|---|---|
| Heavy Whipping Cream | Adds aeration and lift | Full fat coconut cream |
| Condensed Milk | Sweetens and stops crystallization | Evaporated milk + powdered sugar |
| Graham Crumbs | Creates a salty base | Crushed ginger snaps |
| Butterfinger Bars | Main flavor and texture | Peanut butter cups |
For the Graham Cracker Crust
- 1.5 cups (150g) graham cracker crumbs Why this? Offers a balanced, salty foundation
- 6 tbsp (85g) unsalted butter, melted Why this? Holds the crumbs together
- 2 tbsp (25g) granulated sugar Why this? Gives the base a light crunch
- Substitute: Try crushed digestive biscuits for a more malty, dense result.
For the Creamy Filling
- 2 cups (480ml) heavy whipping cream, cold Why this? The high fat percentage allows for stiff peaks
- 1 can (14 oz / 397g) sweetened condensed milk, chilled Why this? Serves as both a stabilizer and sweetener
- 1 tsp (5ml) pure vanilla extract Why this? Balances the sugary notes of the candy
- 1 pinch (1g) salt Why this? Offsets the sweetness
- Substitute: Use coconut cream for a dairy-free version, though the texture will be thicker.
For the Butterfinger Crunch
- 3 (1.8 oz / 51g) Butterfinger candy bars, coarsely chopped Why this? Coarser pieces provide varied texture
- 0.5 cup (60g) Butterfinger pieces Why this? Ensures a consistent top coating
- Substitute: Use chopped Heath bars for a toffee style twist.
Essential Equipment List
I keep the equipment simple for this recipe. All you really need is a standard 9x9 inch baking pan. I recommend lining it with parchment paper that extends past the edges; this makes it easy to hoist the entire block out afterward, sparing you the trouble of scraping frozen cream from the corners.
To achieve the perfect consistency, use either an electric hand mixer or a stand mixer (like a KitchenAid). I also suggest using a cold metal bowl. If your bowl is too warm, the cream's fat won't trap the air bubbles, and you'll get a runny liquid rather than a light, fluffy filling.
The Cooking Process
Preparing the Base
- Mix the melted butter, graham cracker crumbs, and sugar in a bowl.
- Pack the blend into a parchment lined 9x9 pan. Use the back of a spoon until it forms a flat, mahogany colored layer.
Making the Filling
- Pour the cold heavy cream into a chilled bowl.
- Beat on high speed until stiff peaks form. Note: Stop immediately once the peaks hold their shape to avoid over beating into butter.
- In a separate bowl, stir together the vanilla, salt, and sweetened condensed milk.
- Using a spatula, gently fold the whipped cream into the condensed milk until the mixture is velvety and uniform.
Adding the Crunch
- Fold in the coarsely chopped Butterfinger bars.
- Spread the mixture evenly over the graham cracker crust.
- Press the final 0.5 cup of candy pieces into the top for a textured finish.
- Smooth the top with a spatula, cover tightly with plastic wrap, and freeze for 6 hours 15 mins until firm to the touch.
What Makes This So Good
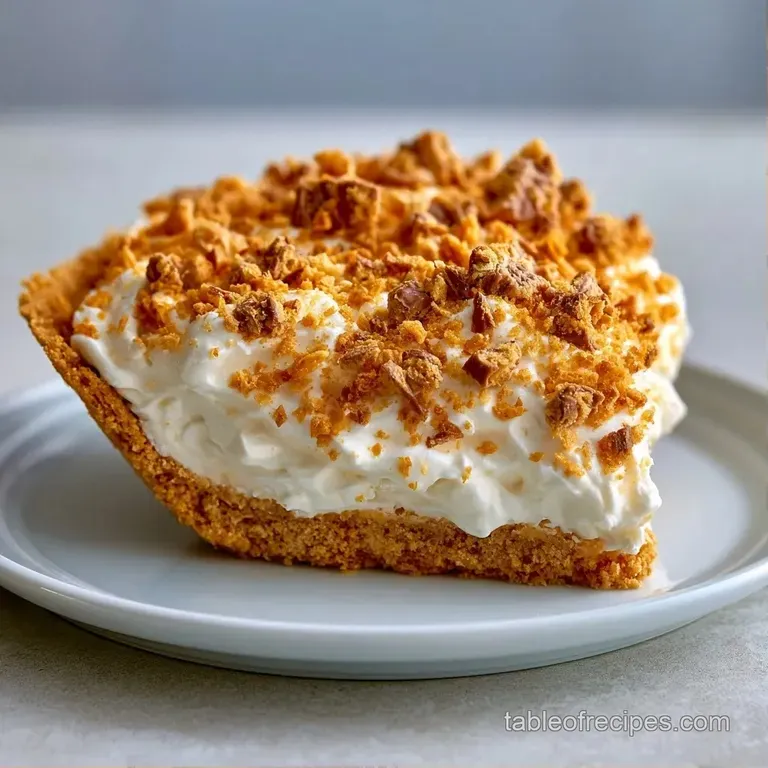
The magic here is the balance of fats. We have the saturated fats from the butter in the crust and the dairy fats in the cream. This creates a layered experience where the crust provides a structural snap, while the filling melts quickly on the tongue.
Because we aren't cooking a custard, there's no risk of scrambling eggs or overheating the base. The stability comes from the chemical relationship between the whipped air and the sugar in the condensed milk. This keeps the dessert from becoming a solid block of ice.
Fixing Common Problems
The biggest hurdles when preparing this Crunch Butterfinger Ice Cream Dessert typically happen during the whipping process. If the cream fails to reach stiff peaks, the whole dessert will collapse, as the fat must remain cold to hold the air.
Another common pitfall is a "rock hard" consistency. Opting for low-fat cream means there isn't enough fat to stop water molecules from freezing into a solid mass, leaving you with a treat that is nearly impossible to scoop.
Fixing Soupy Filling
If your cream stays liquid, the bowl was likely too warm. Place both the beaters and the bowl in the freezer for 10 minutes, then try whipping it again.
Avoiding Hard Freeze
If the dessert is too firm to slice, leave it at room temperature for 5 minutes. This allows the outer edges to soften slightly.
Preventing Soggy Crust
Ensure the butter is completely melted and well blended with the crumbs before pressing them down. If the base remains dry, the filling can leak in and make the crust mushy.
| Problem | Root Cause | Solution |
|---|---|---|
| Filling won't peak | Bowl or cream too warm | Chill gear 10 mins |
| Grainy texture | Over mixing during folding | Fold gently with a spatula |
| Crust crumbles | Base not packed tightly | Press down with a heavy glass |
Debunking Frozen Treat Myths
Many people think no churn ice cream is just "frozen whipped cream." That's not true. The addition of sweetened condensed milk changes the chemistry, creating a denser, more stable emulsion that mimics traditional churned ice cream.
Some believe you need an expensive machine to get a smooth result. While machines incorporate air more consistently, the high sugar content in this recipe does the same job by preventing large ice crystals.
Storage and Zero Waste
Keep this treat in the freezer, wrapped tightly in plastic or stored in a sealed container. It will remain delicious for up to 2 weeks. Beyond that, the graham cracker crust may pick up odors from the freezer, so ensure it is kept well sealed.
If you have extra graham cracker crumbs or melted butter, save them. I like to stir in some honey and bake the mixture at 325°F for 10 minutes to create a fast granola topping for yogurt.
Creative Dessert Twists
For a saltier kick, try a pretzel crust. Just swap the graham crackers for crushed pretzels. This works great if you want a more aggressive contrast to the sweet cream. You can also add a layer of sliced bananas on top of the crust before adding the cream for a "banana split" vibe.
If you enjoy other candy based treats, you might like this Cream Cake for 12 recipe or a more elaborate Butterfinger topped cake. Both use similar stabilization techniques but vary the mix ins.
For those who want a more formal presentation, you can freeze this in a springform pan. This lets you remove the sides and frost the exterior with a whipped topping for a professional look.
Serving and Pairing
Since this dessert is so decadent, it pairs best with a contrasting flavor. A cup of bold, black coffee or a tangy raspberry coulis are great options. The coffee's bitterness provides a nice balance to the sweetness of the condensed milk.
Portion the dessert into squares. To achieve sharp, precise edges, dip your knife in warm water for 10 seconds before slicing. This technique stops the cream from smudging and keeps the Butterfinger pieces intact.
When serving guests, place a single fresh raspberry atop each slice. The berry's brightness refreshes the palate amidst the dense peanut butter and cream.
Recipe FAQs
How to ensure the crust is firm?
Firmly pack the crumb mixture into the pan with a spoon.
Tip: Use a flat bottomed glass for an even tighter seal.
What prevents the cream from overbeating?
Stop mixing immediately once stiff peaks form.
Tip: chill your mixing bowl and beaters beforehand to stabilize the fat.
Is it true this recipe requires an ice cream machine?
False. The combination of whipped cream and sweetened condensed milk creates a stable frozen texture without churning.
Tip: ensure the condensed milk is chilled to help the dessert set faster.
Can I substitute the Butterfinger with other candies?
Use any chopped candy bar or chocolate chunks you prefer.
Tip: if you like a similar layered texture, try the method in our peanut butter ice cream cake.
When should I take the dessert out of the freezer?
Remove the pan about 10 minutes before serving to allow for easier slicing.
Tip: dip your knife in hot water between cuts for clean edges.
Do I need to bake the base before adding cream?
This one's false: the melted butter binds the crumbs sufficiently without heat.
Tip: line the pan with parchment paper for effortless removal.
Which tool is best for folding in the candy?
Use a rubber spatula to gently incorporate the pieces without deflating the whipped cream.
Tip: fold using a "cut and lift" motion rather than stirring.
Crunch Butterfinger Ice Cream Dessert