Butterfinger Topped Ice Cream Cake with Condensed Milk
- Time: 20 min active + 6 hours chilling
- Flavor/Texture Hook: Shatter crisp candy base with a light as-air cream topping
- Perfect for: High energy parties or candy obsessed dessert lovers
- Butterfinger Topped Ice Cream Cake
- Detailed Recipe Specifications
- Why These Ingredients Work
- Essential Ingredients and Swaps
- Necessary Kitchen Equipment
- Step-by-Step Assembly Guide
- Hidden Technical Details
- Troubleshooting and Pro Tips
- Adjusting the Batch Size
- Dispelling Ice Cream Myths
- Freezing and Storage Guide
- Flavor Adaptation Ideas
- Pairing and Complementary Dishes
- Recipe FAQs
- 📝 Recipe Card
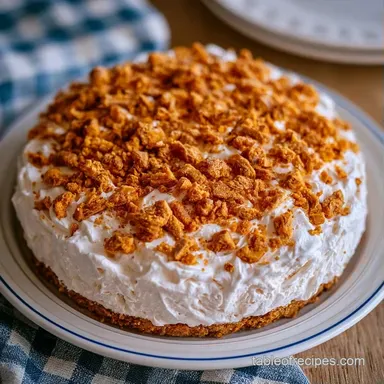
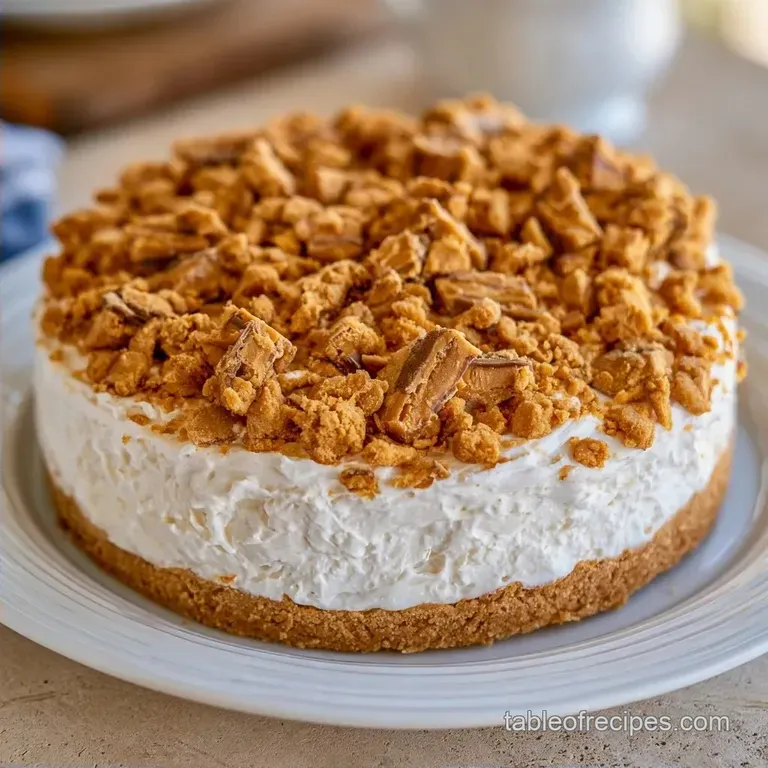
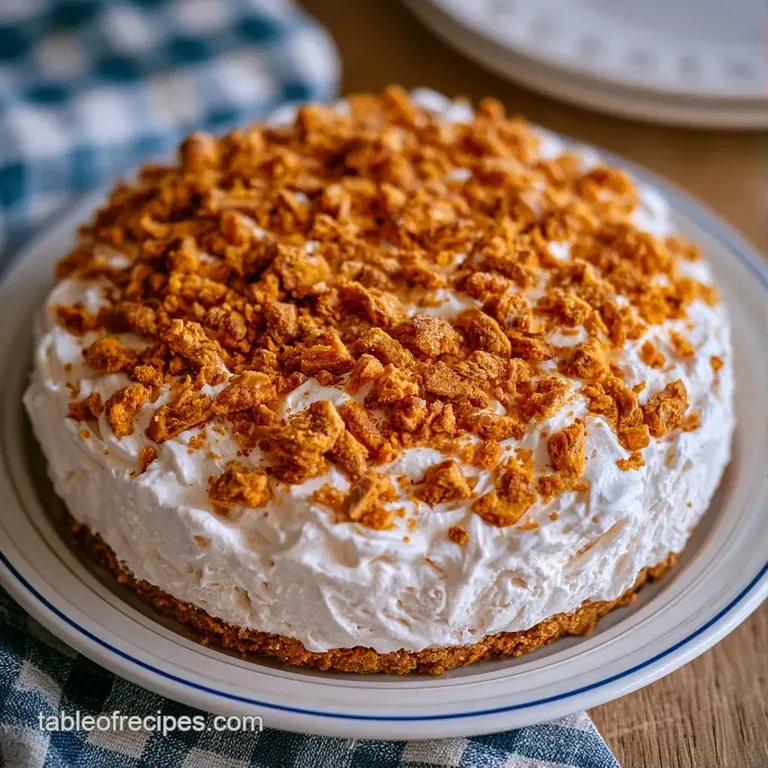
Butterfinger Topped Ice Cream Cake
You've probably tried making a candy based crust only to find it's basically a concrete slab. It's a common failure where the butter to crumb ratio is off, leaving you with a base that resists a knife , worse, crumbles into dust the moment you slice it.
The struggle isn't the ingredients, it's the thermal management of the fats.
I spent a long time figuring out how to keep that distinct Butterfinger crunch without the crust becoming an impenetrable wall. The fix involves a specific flash freeze window and a controlled temperature for the ice cream fold. If the ice cream is too warm, it soaks into the crust and turns it into mush.
If it's too cold, you get air pockets that ruin the slice.
This Butterfinger Topped Ice Cream Cake focuses on those precise windows. We're aiming for a stable, three tier system: a set fat base, a solute heavy frozen center, and an aerated lipid topping. When these three densities align, you get a cake that holds its shape but melts effortlessly on the tongue.
Detailed Recipe Specifications
Condensed Milk: By increasing the solute concentration, we lower the freezing point of the ice cream. This prevents the cake from becoming a hard brick of ice.
Flash Freezing: Setting the crust for exactly 10 minutes locks the butter into a crystalline structure. This creates a moisture barrier that stops the filling from migrating into the base.
Over run Control: Gently folding the candy pieces instead of stirring them prevents the whipped air from escaping. This maintains the lightness of the center.
| Mixing Method | Time | Texture | Best For |
|---|---|---|---|
| Hand Whisk | 15 mins | Soft, natural peaks | Small batches/lightness |
| Stand Mixer | 4 mins | Stiff, stable peaks | Consistent aeration |
Why These Ingredients Work
| Ingredient | What It Does | Best Swap |
|---|---|---|
| Butterfinger Candy | Provides structural crunch and salt | Peanut brittle (adds harder snap) |
| Condensed Milk | Lowers freezing point for scoopability | Maple syrup (thinner, alters sugar profile) |
| Heavy Cream | Creates a stable foam via fat globules | Coconut cream (full fat, adds tropical note) |
Essential Ingredients and Swaps
- 2 cups (220g) crushed Butterfinger candy bars Why this? Base for the flavor and crunch
- 4 tbsp (55g) unsalted butter, melted Why this? Binds the crumbs into a solid base
- 1 pinch (1g) sea salt Why this? Cuts through the heavy sugar
- 1 quart (946ml) vanilla ice cream, softened slightly Why this? The primary volume of the cake
- ½ cup (155g) sweetened condensed milk Why this? Prevents ice crystals from forming
- 1 cup (125g) chopped Butterfinger pieces Why this? Textural contrast in the center
- 2 cups (480ml) heavy whipping cream, cold Why this? High fat content for stable peaks
- 3 tbsp (36g) powdered sugar Why this? Stabilizes the whipped cream foam
- 1 tsp (5ml) vanilla extract Why this? Enhances the vanilla notes in the ice cream
- ½ cup (60g) crushed Butterfingers Why this? Final garnish for visual appeal
Necessary Kitchen Equipment
You will need a 9 inch springform pan. This is non negotiable because a standard cake pan makes it nearly impossible to remove the cake without destroying the layers. A rubber spatula is also essential for folding, as a whisk would deflate the ice cream mixture.
For the topping, a stand mixer such as a KitchenAid works best for achieving the necessary peak stability, though a hand mixer is fine if you're careful. An offset spatula helps get that flat, professional surface before the final freeze.
Step-by-step Assembly Guide
Phase 1: Building the Shatter Crust
- Combine the crushed Butterfinger candy, melted butter, and salt in a bowl. Stir until the mixture resembles wet sand.
- Press the mixture firmly into the bottom of the springform pan using the back of a spoon.
- Freeze the crust for 10 minutes until the fats solidify. Note: This prevents the crust from mixing into the filling.
Phase 2: Folding the Frozen Center
- In a large bowl, fold the softened ice cream and sweetened condensed milk together using a rubber spatula until just combined.
- Gently fold in the chopped Butterfinger pieces.
- Pour the mixture over the chilled crust and smooth the top with an offset spatula.
- Freeze for at least 4 hours until the edges are firm to the touch.
Phase 3: The Finishing Touch
- Beat the cold heavy cream, powdered sugar, and vanilla extract on medium high until stiff peaks form.
- Spread the whipped cream evenly over the frozen ice cream layer.
- Immediately sprinkle the remaining crushed Butterfingers across the top before the cream sets.
- Return to the freezer for 2 hours until the entire structure is rigid before releasing the springform sides.
Hidden Technical Details
The most critical part of this process is the "softened" state of the ice cream. You aren't looking for melted liquid, but a consistency similar to soft serve. According to the guidelines for dairy stability on Serious Eats, maintaining the correct temperature during the folding process prevents the emulsion from breaking.
If you fold the condensed milk into ice cream that is too cold, you'll end up with streaks of syrup instead of a homogeneous mixture. Conversely, if it's too warm, you'll incorporate too much air, and the cake will shrink as it refreezes.
Chef's Note: For a more professional slice, dip your knife in hot water and wipe it dry between every single cut. This prevents the cream from dragging into the candy layer.
Troubleshooting and Pro Tips
| Issue | Solution |
|---|---|
| Why Your Crust is Too Soft | If the crust doesn't hold, it's usually due to under pressing or insufficient chilling. Ensure you use the back of a spoon to pack the crumbs tightly. |
| Why Your Topping is Grainy | Overbeating the cream is the primary cause. Once you hit stiff peaks, stop immediately. If you go too far, the fat globules clump together, turning your silky cream into butter. |
| Why Your Slices are Melting | This happens when the cake is taken out of the freezer too early or the internal temperature is too high. The condensed milk helps, but the cake still needs that final 2 hour set. |
Precision Checkpoints:
- Crust set time: 10 minutes
- Primary freeze: 4 hours
- Final set: 2 hours
Adjusting the Batch Size
When scaling this Butterfinger Topped Ice Cream Cake, remember that volume increases faster than surface area.
Scaling Down (1/2 Batch): Use a 6 inch springform pan. Reduce the freeze time for the crust to 8 minutes. Since you're using half the volume, the center will freeze faster, so check the firmness after 3 hours.
Scaling Up (2x Batch): Work in batches for the whipped cream. If you try to whip 4 cups of cream in a standard bowl, you'll lose aeration at the bottom. Use two separate 9 inch pans rather than one deep pan to ensure the center freezes evenly.
Decision Shortcut:
- Want a softer crust? Reduce butter by 5g.
- Want a denser filling? Use 1/4 cup less condensed milk.
- Want firmer peaks? Chill the mixing bowl for 15 mins.
Dispelling Ice Cream Myths
You might hear that adding more sugar makes ice cream softer. While sugar does lower the freezing point, simply dumping in more powdered sugar will make the cake cloying. The goal is to use specific solutes like condensed milk to manage the texture without ruining the flavor balance.
Another common myth is that you can use "light" or low-fat ice cream. This is a mistake. low-fat options have higher water content, which leads to the formation of large ice crystals. These crystals create a gritty texture that clashes with the crunch of the candy.
Freezing and Storage Guide
Store the cake in the freezer, wrapped tightly in plastic wrap or placed in an airtight container. This prevents the whipped cream from absorbing odors from other frozen foods, like fish or garlic. It will stay fresh for up to 2 months.
Zero Waste Tips: If you have leftover whipped cream, don't toss it. Fold in some fresh berries for a quick dessert. If you have leftover Butterfinger crumbs, stir them into a vanilla milkshake or use them as a topping for a bowl of yogurt.
Flavor Adaptation Ideas
If you want to change the profile, you can swap the vanilla ice cream for a peanut butter base. This turns the dessert into something similar to my Peanut Butter Ice Cream Cake, but the added snap of the Butterfinger.
For a richer experience, replace the vanilla extract in the whipped cream with a teaspoon of almond extract. The nuttiness complements the peanut butter in the candy. You could also add a layer of salted caramel between the crust and the ice cream for a more complex flavor profile.
Pairing and Complementary Dishes
This cake is incredibly rich, so it pairs best with something acidic or bitter to cleanse the palate. A strong espresso or a dark roast coffee is the classic choice. The bitterness of the coffee cuts through the sweetness of the condensed milk.
If you're planning a dessert spread, serve this alongside a tart fruit salad. For another indulgent option, you could serve a slice of Pudding Ice Cream Cake recipe for those who prefer a smoother, more buttery flavor. Avoid serving this with other heavy chocolate desserts, as the peanut butter notes in the Butterfinger Topped Ice Cream Cake need room to breathe.
Recipe FAQs
What kind of cake do you use for Butterfinger cake?
This recipe uses a candy crumb crust instead of traditional sponge cake. If you enjoy contrasting textures in desserts, see how we balance crunch and softness in our apple crisp.
What are the crunchies in ice cream cakes?
The crunch comes from crushed and chopped Butterfinger candy bars. These are layered in the crust, folded into the ice cream, and sprinkled on top.
How to make ice cream cake?
Press a mixture of crushed candy and melted butter into a pan and freeze for 10 minutes. Fold softened ice cream with condensed milk and candy pieces, freeze for 4 hours, then top with whipped cream and more candy.
Why is my ice cream cake crust too soft?
You likely didn't press the crumbs firmly enough or chilled it for too short a time. Use the back of a spoon to pack the mixture tightly into the pan before freezing.
Why is the whipped cream topping grainy?
You overbeat the cream past the stiff peak stage. This causes the fat globules to clump together, turning your silky cream into butter.
How long does this cake need to freeze?
Freeze for a total of 6 hours. The ice cream layer requires 4 hours to set, and the final cake needs 2 additional hours after adding the whipped cream.
Is it true that the crust must be baked?
No, this is a common misconception. This is a no-bake recipe that relies on freezing the fats in the butter and candy to set the base.
Butterfinger Topped Ice Cream Cake