Butterfinger Ice Cream Sandwich Cake with Vanilla

- Time: 20 min active + 6 hrs chilling
- Flavor/Texture Hook: Crunchy peanut butter candy mixed with smooth, cold cream
- Perfect for: Summer parties, birthday crowds, or high energy dessert cravings
- Butterfinger Ice Cream Sandwich Cake
- Preventing Structural Failures
- Necessary Ingredients List
- Required Kitchen Tools
- Step-by-Step Assembly
- Solving Common Problems
- Troubleshooting Common Issues
- Flexible Ingredient Swaps
- Scaling the Recipe
- Butterfinger Myths
- Storage and Freezing
- Serving Suggestions
- Recipe FAQs
- 📝 Recipe Card
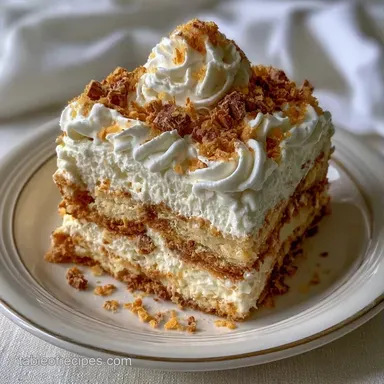
Butterfinger Ice Cream Sandwich Cake
Imagine the sound of a Butterfinger bar snapping. Now imagine that crunch embedded in a thick layer of cold, sweetened cream, stacked between vanilla ice cream sandwiches. It's a heavy hitter of a dessert that hits every note: salty, sweet, and freezing cold.
I've spent a lot of time thinking about the structural integrity of no bake cakes. Most people just stack things and hope for the best, but that leads to a sliding mess once it hits the table. This Butterfinger Ice Cream Sandwich Cake uses a specific aeration method for the cream to ensure the cake stays put.
You can expect a dessert that looks like a professional bakery slab but requires zero actual cooking. The focus here is on precision in the assembly and the patience to let the freezer do the heavy lifting.
Preventing Structural Failures
The biggest risk with a sandwich cake is "layer slide." This happens when the cream filling doesn't have enough stability to grip the ice cream sandwiches. Using cold heavy cream and whipping it to stiff peaks creates a network of air bubbles that acts like a glue.
Another failure mode is the "soggy wafer" effect. If you don't freeze the cake for the full time, the moisture from the whipped cream migrates into the cookies. This ruins the snap. According to King Arthur Baking, maintaining proper temperature and fat ratios in cream is what prevents these textural collapses.
Finally, the "melt down" occurs during slicing. If the knife is room temperature, it drags the cream and ice cream down, smearing the layers. A hot, wet knife is the only way to get those clean, sharp lines.
Base Method Comparison
| Feature | No Bake Sandwich Base | Traditional Baked Base |
|---|---|---|
| Time | 20 min assembly | 45 min bake + cool |
| Texture | Soft, creamy, frosty | Dense, crumbly, buttery |
| Best For | High speed prep | Formal dinner parties |
Necessary Ingredients List
The hero here is the Butterfinger candy. I chose it because the flaky, layered structure of the peanut butter center provides a contrast that smooth peanut butter spreads just can't match.
Ingredient Deep Dive
| Ingredient | What It Does | Best Swap |
|---|---|---|
| Heavy Whipping Cream | Provides the airy structure | Chilled coconut cream (thicker part) |
| Powdered Sugar | Stabilizes the air bubbles | Icing sugar (identical result) |
| Butterfinger Bars | Adds crunch and salty notes | Heath bar (toffee instead of PB) |
| Ice Cream Sandwiches | Acts as the cake "sponge" | Homemade vanilla sandwiches |
The Full List
- 12 vanilla ice cream sandwichesWhy this? Consistent thickness for even layers
- 1 tbsp melted unsalted butterWhy this? Prevents the parchment from sticking
- 2 cups heavy whipping cream, coldWhy this? High fat content for stiff peaks
- 1/2 cup powdered sugarWhy this? Dissolves instantly without graininess
- 1 tsp vanilla extractWhy this? Rounds out the sugar hit
- 2 cups Butterfinger candy bars, roughly choppedWhy this? Large chunks for textural pops
- 1/2 cup Butterfinger candy bars, finely crushedWhy this? Creates a uniform top crust
- 1/4 cup chocolate syrupWhy this? Adds a bittersweet contrast
- 1 cup whipped toppingWhy this? Holds its shape for garnish
Required Kitchen Tools
You don't need a professional kitchen, but a few specific tools make this a lot easier. An 8x8 inch baking pan is non negotiable here. If you use a larger pan, the sandwiches won't fit snugly, and the cake will shift.
I highly recommend an offset spatula. It allows you to smooth the cream without pressing too hard and deflating the air bubbles. You'll also need a handheld mixer or a stand mixer such as a KitchenAid to get the cream to the right consistency.
Finally, grab a sharp chef's knife. Serrated knives can tear the ice cream sandwiches, while a smooth blade glides through the layers.
Step-by-step Assembly
Phase 1: Setting the Foundation 1. Lightly grease an 8x8 inch baking pan with melted butter. Line it with parchment paper, leaving an overhang on two sides. Note: This lets you lift the whole cake out later. 2. Arrange 6 ice cream sandwiches in the bottom of the pan.
Trim edges if needed to fit snugly. Press down lightly to remove air gaps.
Phase 2: Creating the Crunch Layer 3. Pour cold heavy whipping cream, powdered sugar, and vanilla extract into a chilled bowl. Beat on high until stiff peaks form. Note: The mixture should hold its shape when you lift the beaters. 4.
Gently fold the 2 cups of roughly chopped Butterfinger candy bars into the whipped cream. Use a spatula to keep the air in.
Phase 3: Final Assembly and Set 5. Spread half of the Butterfinger cream mixture evenly over the first layer of ice cream sandwiches. 6. Place the remaining 6 ice cream sandwiches on top of the cream layer. 7. Spread the remaining cream mixture over the top.
Smooth it with an offset spatula until level. 8. Sprinkle the finely crushed Butterfingers over the top. Garnish with chocolate syrup and piped whipped topping. 9. Freeze for 6 hours to set the structure before slicing.
Solving Common Problems
Troubleshooting Common Issues
| Issue | Solution |
|---|---|
| Why Your Cake Layers Slide | This usually happens because the whipped cream was under beaten. If the peaks are "soft" instead of "stiff," they lack the strength to hold the weight of the second layer of sandwiches. |
| Why Your Wafers Feel Soggy | Sogginess is a sign of premature thawing or insufficient freezing. When the cake sits at a slightly higher temperature, the ice cream melts into the wafer. Stick to the 6 hour rule. |
| Why the Top is Uneven | If you don't use an offset spatula, the cream tends to mound in the middle. This makes the slices inconsistent. Quick Fix Table |
Flexible Ingredient Swaps
If you're looking for a different flavor profile, you can swap the candy. For a more classic approach, try my Cream Cheese Ice Cream Cake which uses a tangy base.
Substitution Guide
| Original Ingredient | Substitute | Why It Works |
|---|---|---|
| Butterfinger Bars | Peanut Butter Cups | Similar flavor, though less "crunch" |
| Heavy Cream | Coconut Cream | Similar fat content. Note: Adds coconut flavor |
| Vanilla Sandwiches | Chocolate Sandwiches | Deepens the cocoa profile of the cake |
Decision Shortcut
- If you want more crunch, double the crushed candy on top.
- If you want a less sweet cake, reduce powdered sugar to 1/3 cup.
- If you're serving a crowd, use a 9x13 pan and double all ingredients.
Scaling the Recipe
Scaling Down To make a smaller version, use a 4x4 or 6x6 mini pan. Use 3-4 sandwiches per layer. Reduce the whipped cream and sugar by half. Since there's less mass, the freezing time can be reduced to 4 hours.
Scaling Up For a party sized 9x13 pan, you'll need about 24 sandwiches. Double the cream and candy. I recommend working in batches when whipping the cream so it doesn't over beat. When doubling, increase the freezing time by 2 hours to ensure the center is fully set.
For the garnish, keep the chocolate syrup at the same ratio, but add extra whipped topping peaks to cover the larger surface area.
Butterfinger Myths
Some people think you can use "non dairy" whipped topping instead of heavy cream for the filling. This is a mistake. While non dairy toppings are stable, they lack the fat required to bond with the ice cream sandwiches, resulting in a slippery cake.
Another myth is that you can slice this cake immediately after it comes out of the freezer. The outer edges will be hard, but the center often stays slightly soft. Waiting 5 minutes at room temperature actually makes the slicing cleaner.
Storage and Freezing
Store this cake in the freezer in an airtight container. It stays fresh for up to 2 months. If you notice ice crystals forming on the top, it's because air got into the container. Press a piece of plastic wrap directly onto the surface of the cream to prevent this.
To reheat or serve, don't put it in the microwave. Simply let it sit on the counter for 10-15 minutes. This softens the wafers just enough to be pleasant without melting the core.
For zero waste, if you have broken pieces of ice cream sandwiches, don't toss them. Crush them up and fold them into the whipped cream along with the Butterfingers for extra texture.
Serving Suggestions
This cake is incredibly rich, so it pairs well with something acidic or light. A bowl of fresh raspberries or a tart lemon coulis cuts through the peanut butter and cream.
If you're planning a dessert menu, this goes great alongside a lighter option. For another indulgent treat, you could serve this with a slice of my Pudding Ice Cream Cake recipe for a total sugar rush.
For a gourmet touch, serve each slice with a pinch of flaky sea salt on top. The salt wakes up the peanut butter and makes the chocolate syrup pop.
Recipe FAQs
How to assemble the layers for stability?
Arrange ice cream sandwiches snugly in a greased 8x8 inch pan. Press them down lightly to remove air gaps and layer them with stiff peak whipped cream to ensure the cake stays together.
Why are my cake layers sliding?
The whipped cream was likely under beaten. If the peaks are soft rather than stiff, they lack the strength to support the weight of the second layer of sandwiches.
How to prevent the wafers from getting soggy?
Freeze the cake for a full 6 hours. Sogginess occurs when the cake thaws prematurely or isn't frozen long enough, causing the ice cream to melt into the wafer.
How to serve the cake without it melting?
Let it sit on the counter for 10-15 minutes before slicing. This softens the wafers just enough to be pleasant without melting the frozen core.
How to store the cake to prevent ice crystals?
Press plastic wrap directly onto the cream surface before sealing in an airtight container. This blocks air from reaching the cream, which prevents crystallization during freezer storage.
Is it true that soft peaks are sufficient for the cream layer?
No, this is a common misconception. You must beat the heavy whipping cream, powdered sugar, and vanilla on high until stiff peaks form to provide necessary structural support.
Can I use a different base instead of vanilla ice cream sandwiches?
Yes, any sturdy ice cream sandwich works. If you prefer a different style of frozen treat, you might enjoy the texture of our cream cheese ice cream dessert.
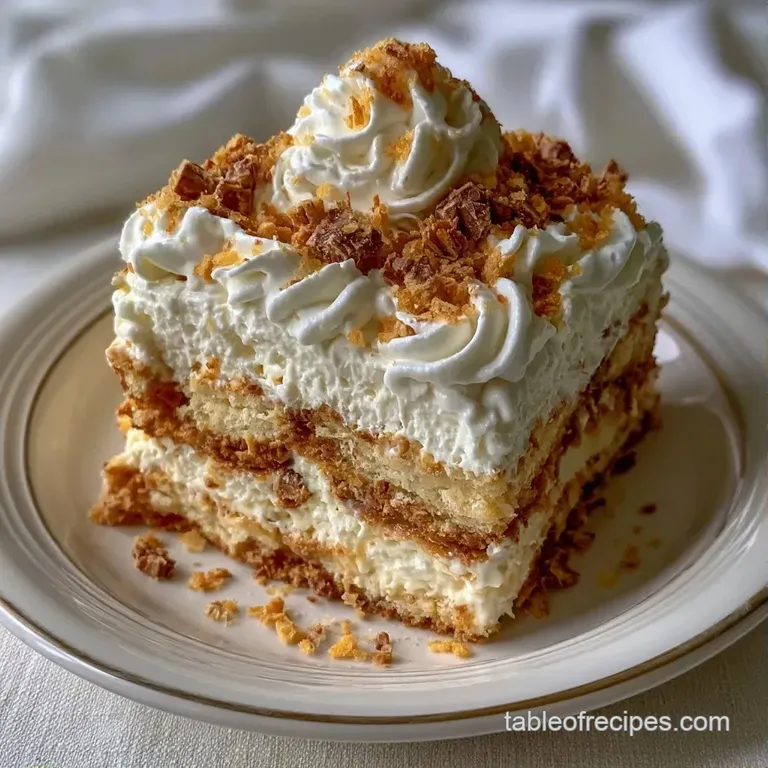
Butterfinger Ice Cream Sandwich Cake