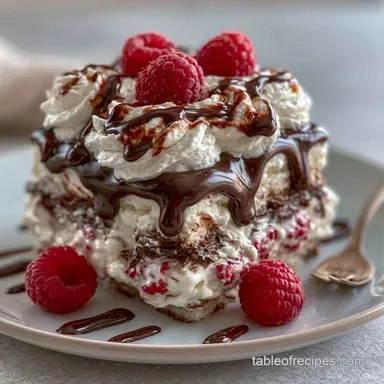
No Bake Ice Cream Sandwich Cake with Fudge
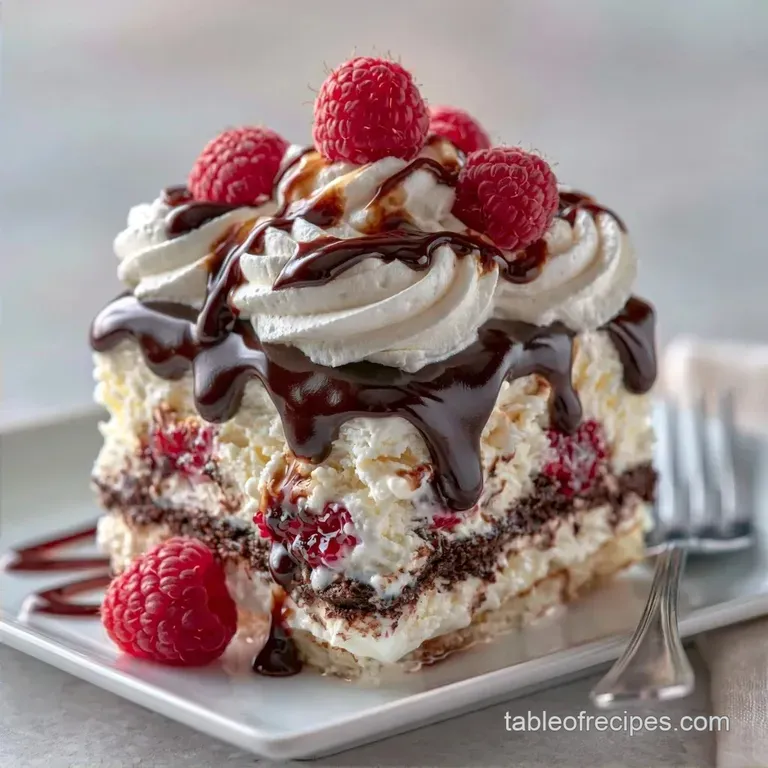
- Time: 15 min active + 4 hrs chilling
- Flavor/Texture Hook: Rich, fudgy, and cold
- Perfect for: Last minute summer crowds
No Bake Ice Cream Sandwich Cake
It is a brutal July afternoon and the air feels like a warm blanket. You have a house full of people, and the last thing anyone wants is a hot oven cranking up the temperature. I remember trying to make these with homemade cookies once, but the cookies softened too much and the whole thing slid apart on the plate.
The shift to store-bought sandwiches changed everything. They have a consistent density that handles the weight of the toppings without getting mushy. You get a towering, impressive dessert that takes about fifteen minutes of actual work.
This No Bake Ice Cream Sandwich Cake delivers that bakery look without the stress. It is essentially an assembly project that results in a rich, chilled treat that tastes like a giant, layered ice cream sandwich.
Frozen Bases: Pre made sandwiches provide a structural foundation that doesn't collapse under the weight of the toppings. Sugar Balance: The fudge sauce acts as a glue, bonding the frozen layers and the whipped cream together.
| Method | Time | Texture | Best For |
|---|---|---|---|
| store-bought | 15 mins | Consistent | Quick parties |
| Homemade | 3 hours | Variable | Special events |
Detailed Recipe Specs
Right then, let's look at the numbers. Precision here prevents the "slide" where the top layer shifts during slicing.
- Total Prep Time: 15 minutes
- Freeze Time: 4 hours
- Total Time: 4 hours 15 minutes
- Yield: 9 servings
- Pan Size: 9x9 inch square
- 1. Cream Consistency
- Beat until the peaks stand straight up without drooping.
- 2. Temperature
- Ensure the fudge sauce is room temperature, not hot.
- 3. Freeze Duration
- Do not cut before the 4 hour mark or the center will be soup.
The Ingredient Breakdown
The fat content in the cream and fudge is what keeps this dessert from becoming an ice block.
| Ingredient | Role | If You Don't Have It |
|---|---|---|
| Heavy Cream | Structural lift | Full fat coconut cream |
| Fudge Sauce | Adhesive layer | Thick chocolate ganache |
| Ice Cream Sandwiches | Core base | Frozen brownie slices |
Tools You'll Need
You don't need fancy gear, but a few specific items make it easier. I use a handheld mixer such as a KitchenAid for the cream.
- 9x9 inch baking pan
- Parchment paper
- Chilled mixing bowl
- Rubber spatula
- Offset spatula (for smoothing the cream)
- Plastic wrap
Assembly step by step
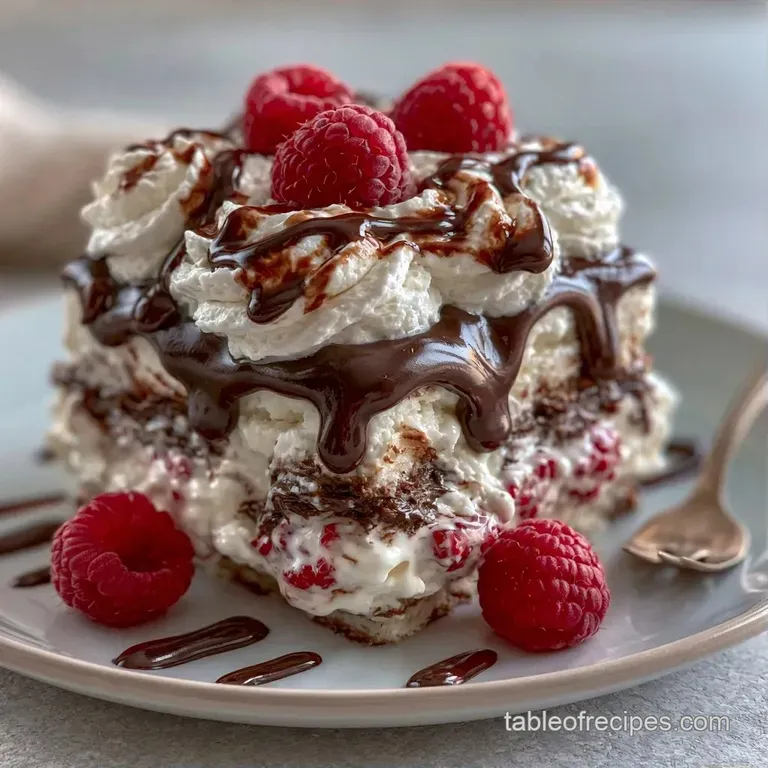
Time to get started. We're aiming to construct a sturdy, frozen dessert tower.
- Prepare the pan. Fit your 9x9 inch pan with parchment paper on the bottom and sides. Ensure there is an overhang to make lifting the cake easier later.
- Whip the cream. Using a cold bowl, beat the powdered sugar and chilled heavy whipping cream until stiff peaks form. Note: This adds a light texture to balance the heavy sandwiches.
- Create the base. Fit 6 ice cream sandwiches into the base of the pan. Press them together to form a level, firm starting point.
- Apply fudge. Evenly pour 1/2 cup of chocolate fudge sauce over the sandwiches.
- First cream layer. Smooth a layer of whipped cream over the fudge, covering the entire surface.
- Build the second layer. Set the final 6 ice cream sandwiches across the cream layer. Make sure they line up with the bottom row.
- Top it off. Spread the rest of the fudge sauce on top, then cover with a final layer of whipped cream.
- Freeze. Seal the pan with plastic wrap. Let it set in the freezer for at least 4 hours or overnight.
- Decorate. Right before serving, top with chocolate shavings and fresh raspberries.
Fixing Common Issues
The biggest headache with frozen desserts is structural failure. If the layers slide, it's usually a temperature or viscosity problem.
Stopping the Slide
If the top layer of sandwiches shifts, your whipped cream was likely too soft. According to guidelines on Serious Eats, temperature is the biggest factor in cream stability. Always use a chilled bowl and heavy cream.
Fixing Runny Fudge
Too thin sauce seeps into the sandwiches and makes them soggy. If your sauce looks watery, simmer it on the stove for 5 minutes to reduce it, then let it cool completely before spreading.
Preventing Ice Crystals
Air is the enemy of frozen desserts. If you see ice crystals on the cream, your plastic wrap wasn't tight enough. Press the wrap directly onto the cream surface to seal out the air.
| Problem | Root Cause | Solution |
|---|---|---|
| Layer Sliding | Soft whipped cream | Beat cream to stiffer peaks |
| Soggy Base | Warm fudge sauce | Cool sauce to room temperature |
| Icy Surface | Air exposure | Use tight fitting plastic wrap |
Ways to Swap Ingredients
You can easily tweak this to fit different cravings. For a different twist, you might try an Oreo ice cream cake which uses a similar layering logic.
- Vanilla Ice Cream Sandwiches
- Use chocolate or mint versions for a different base. Why this? Changes the flavor profile without affecting stability.
- Heavy Whipping Cream
- Use chilled coconut cream for a dairy-free option. Why this? Maintains the necessary fat for structure.
- Powdered Sugar
- Use a tablespoon of maple syrup. Why this? Adds a woody sweetness, though it may soften the cream.
- Chocolate Fudge Sauce
- Use a salted caramel sauce. Why this? Pairs well with the vanilla base.
- Marshmallow Fluff
- Fold in mini marshmallows. Why this? Adds a chewy texture to the layers.
- Chocolate Shavings
- Use toasted coconut flakes. Why this? Adds a nutty crunch.
- Fresh Raspberries
- Use sliced strawberries or blueberries. Why this? Provides the necessary acidity to cut the sugar.
If you want something even richer, a peanut butter chocolate cake is a great alternative for peanut butter lovers.
- For a firmer set
- Freeze for 8 hours instead of 4.
- For more tartness
- Double the amount of fresh raspberries.
- For a richer base
- Use dark chocolate ice cream sandwiches.
Storage and Waste Tips
This dessert stays fresh in the freezer for up to 2 weeks. Keep it wrapped tightly in plastic or move it to an airtight container to prevent the cream from absorbing freezer smells.
To avoid waste, use any leftover whipped cream in your morning coffee. If you have extra fudge sauce, drizzle it over sliced bananas for a quick snack.
Best Way to Serve
Don't try to slice this the second it comes out of the freezer. Let it sit on the counter for about 5 minutes. This softens the edges just enough so the knife doesn't crack the cookies.
Use a sharp knife dipped in hot water between every slice. This ensures you get a clean, sharp cut through the frozen layers. Serve each slice on a chilled plate to keep the fudge from melting too quickly.
The result is a velvety chocolate finish paired with the snap of cold cookies. It's a simple build, but the result looks like it took hours. Trust me, your guests will think you spent the whole day on it.
Recipe FAQs
How to assemble this ice cream cake?
Layer ice cream sandwiches with chocolate fudge sauce and whipped cream in a 9x9 inch pan.
Tip: Press the sandwiches side-by-side firmly to create a flat base.
What ingredients are needed for this dessert?
Combine vanilla ice cream sandwiches, heavy whipping cream, powdered sugar, chocolate fudge sauce, marshmallow fluff, chocolate shavings, and raspberries.
Tip: Ensure the heavy cream is very cold before beating to ensure stability.
Does the cake require a minimum freezing time?
Freeze the assembled cake for at least 4 hours or overnight.
Tip: Use plastic wrap to cover the pan tightly to prevent ice crystals from forming.
Can I prepare this dessert overnight?
Yes, this cake is designed for make-ahead preparation.
Tip: Add the fresh raspberries and chocolate shavings just before serving for the best appearance.
Which technique makes removing the cake easier?
Create a parchment paper sling by leaving an overhang on the sides of the pan.
Tip: Lift slowly from both ends of the paper to keep the layers intact.
Is it true that room temperature cream works?
No, this is a common misconception. Chilled cream is essential for achieving stiff peaks.
Tip: Chill your mixing bowl as well to keep the fat stable during whipping.
Could I swap the raspberries for other berries?
For a different taste, try using strawberries or blueberries instead of raspberries.
Tip: If you like this approach to layering flavors, check out our peanut butter cake.
Where to store the cake to maintain freshness?
Keep the cake in an airtight container inside the freezer.
Tip: This prevents the whipped cream from absorbing smells from other frozen foods.
No Bake Ice Cream Sandwich Cake