Guilt-Free Chocolate Fudge Ice Cream Sandwich Cake
- Time: 15 min active + 6 hrs chilling
- Flavor/Texture Hook: Fudgy, rich, and chilled
- Perfect for: Large family gatherings or holiday desserts
- Chocolate Fudge Ice Cream Sandwich Cake
- Common Failures in Ice Cream Cakes
- Breakdown of Key Ingredients
- Essential Recipe Specifications
- Required Kitchen Tools
- Detailed Assembly Instructions
- Preventing Common Texture Issues
- Adjusting the Yield
- Frozen Dessert Misconceptions
- Storage and Waste Reduction
- Suggested Flavor Pairings
- Alternative Ingredient Swaps
- Recipe FAQs
- 📝 Recipe Card
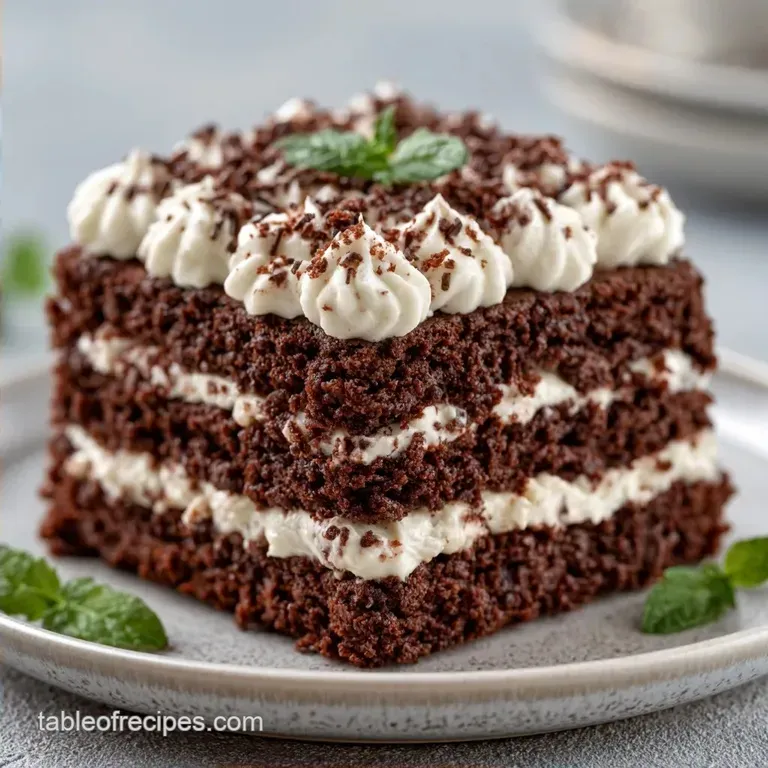
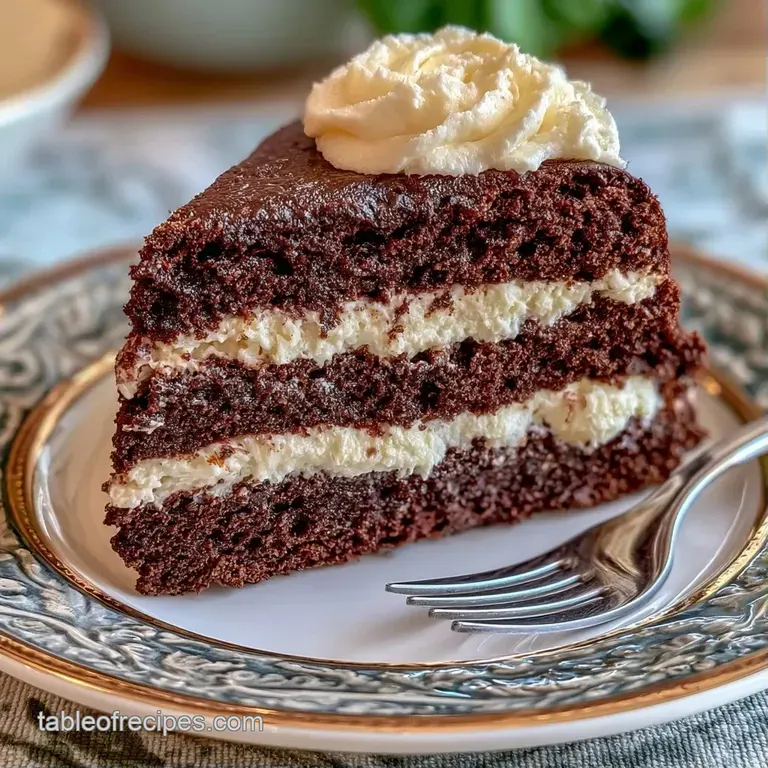
Chocolate Fudge Ice Cream Sandwich Cake
The scent of cold chocolate and frozen cream is the smell of American potlucks. Growing up, ice cream cakes were the centerpieces of every birthday party, often bought from a grocery store freezer.
They represent a specific kind of communal joy, where the goal wasn't a refined pastry, but something cold and satisfying that everyone could dive into.
This specific version uses the ice cream sandwich as a structural building block. It's a clever nod to the convenience of the 90s, but a more grown up flavor profile. By adding a concentrated fudge layer and a tangy cream topping, we move away from the overly sweet taste of commercial cakes.
You can expect a dessert that holds its shape when sliced, provided the freezing time is respected. It's a study in temperature management, balancing the fluidity of the fudge with the rigidity of the frozen sandwiches.
Common Failures in Ice Cream Cakes
Many people find their cakes sliding apart or turning into a puddle. This usually happens because of thermal shock. If you pour hot fudge directly onto frozen ice cream sandwiches, the edges of the sandwiches melt instantly. This creates a slippery layer of liquid that prevents the fudge from gripping the cake.
Another issue is the "sugar crash" ratio. Most store-bought ice cream sandwiches are incredibly sweet. If the fudge and cream layers are equally sugary, the palate becomes overwhelmed, and the flavor flattens. Using 70% dark chocolate provides the necessary bitterness to cut through that sugar.
Structural integrity is the final hurdle. Plain whipped cream often weeps or collapses under the weight of the sandwiches. Adding Greek yogurt introduces proteins and fats that stabilize the air bubbles, ensuring the top layer stays firm and doesn't slide off during the first cut.
The Logic Behind the Layers
- Yogurt Stability: The lactic acid and protein in Greek yogurt prevent the whipped cream from over expanding and collapsing.
- Fudge Viscosity: Allowing the fudge to cool for 10 minutes ensures it's thick enough to act as a glue rather than a lubricant.
- Cold Integration: Chilling the mixing bowl for the cream prevents the fat from melting, which helps in achieving stiff peaks faster.
| Feature | store-bought Sandwiches | Homemade Sandwiches | Impact on Cake |
|---|---|---|---|
| Texture | Uniform and soft | Denser, custom crumb | Homemade is sturdier |
| Effort | Zero prep | 2 hours active | Shortcut is faster |
| Sugar | High | Controlled | Homemade is less cloying |
Breakdown of Key Ingredients
Understanding the role of each component removes the guesswork from the assembly process. Each item is chosen to maintain a specific physical state at freezing temperatures.
| Ingredient | What It Does | Best Swap |
|---|---|---|
| 70% Dark Chocolate | Provides structure and bitterness | 60% Semi sweet (sweeter result) |
| Greek Yogurt | Stabilizes the cream layer | Mascarpone (richer, less tangy) |
| Monk Fruit Sweetener | Adds sweetness without adding moisture | Powdered sugar (more traditional) |
| Heavy Cream | Creates the fat matrix for aeration | Coconut cream (for dairy-free) |
Essential Recipe Specifications
Precision is the only way to ensure this cake doesn't slump. Follow these weights and times strictly.
Precision Checkpoints
- Fudge Cooling: Exactly 10 minutes before pouring.
- Microwave Intervals: 30 second bursts to avoid scorching the chocolate.
- Freeze Duration: Minimum of 6 hours for full crystallization.
Decision Shortcut
- Want a sharper taste? Use 85% dark chocolate for the fudge.
- Want more stability? Add 1 tbsp extra Greek yogurt to the cream.
- Want a softer slice? Chill for 4 hours instead of 6.
Required Kitchen Tools
You don't need professional gear, but a few specific items make the process cleaner.
- 9x13-inch baking pan (standard rectangular)
- Parchment paper (essential for removal)
- Microwave safe glass bowl (for the fudge)
- Chilled stainless steel bowl (for whipping cream)
- Hand mixer or stand mixer such as KitchenAid
- Offset spatula (for smoothing the cream)
Detailed Assembly Instructions
Follow these steps in order. Do not rush the cooling phases, or the layers will merge.
Phase 1: Preparing the Rich Fudge Base
- Place chopped dark chocolate and 1/2 cup heavy cream in a microwave safe bowl.
- Microwave in 30 second intervals, stirring each time, until the mixture is glossy and smooth. Note: Stirring prevents the chocolate from seizing.
- Stir in the maple syrup and vanilla extract until fully incorporated.
- Let the fudge cool for 10 minutes until it is thick but still pourable.
Phase 2: Whipping the Stabilized Cream
- Pour the cold heavy whipping cream, Greek yogurt, monk fruit sweetener, and vanilla into a chilled bowl.
- Beat on medium high speed until stiff peaks form. Note: Stop immediately once peaks hold their shape to avoid over beating into butter.
Phase 3: Building the Architecture
- Line a 9x13-inch baking pan with parchment paper, leaving an overhang on the sides.
- Pour the cooled fudge into the bottom of the pan, spreading it evenly.
- Layer the chocolate ice cream sandwiches on top of the fudge in a single, tight layer.
- Spread the stabilized cream over the sandwiches, smoothing the top with a spatula.
Phase 4: The Deep Freeze
- Sprinkle toasted almond slivers over the top and drizzle with hot fudge sauce.
- Chill the cake in the freezer for a minimum of 6 hours until the entire block is firm.
Preventing Common Texture Issues
The most frequent complaint with this recipe is the "Rock Hard Slice." This happens when the cake stays in the freezer too long, and the water molecules in the cream form large ice crystals. To fix this, move the cake to the refrigerator for 15-20 minutes before slicing.
This allows the outer edges to soften slightly.
If you notice the layers sliding, it's usually because the ice cream sandwiches were too soft when you added them. They should be frozen solid. For a different take on this structure, you might try an Oreo ice cream sandwich cake, which uses a denser cookie base.
Another failure is cream separation, where the topping looks grainy. This is caused by using room temperature cream or a warm bowl. Always chill your equipment.
| Problem | Root Cause | Solution |
|---|---|---|
| Rock hard slice | Over freezing | Thaw in fridge 15 mins |
| Sliding layers | Fudge was too hot | Cool fudge 10 mins |
| Cream collapse | Under beating | Beat to stiff peaks |
Adjusting the Yield
When changing the size of this cake, you cannot simply double everything without adjusting the physics of the pan.
Scaling Down (Half Batch) Use an 8x8-inch square pan. Reduce the freezing time by about 20%, as the smaller mass reaches temperature faster. If the recipe calls for an odd number of eggs (not applicable here), beat one egg and use half.
Scaling Up (Double Batch) If you are moving to a larger catering tray, work in batches. Do not double the salt or vanilla exactly; use 1.5x instead to avoid an overpowering flavor. Increase the freezing time to 8 hours to ensure the center of the larger mass is fully set.
Frozen Dessert Misconceptions
Many people believe that using "low-fat" cream makes the cake healthier without affecting the result. In reality, the fat in heavy cream is what holds the air bubbles. low-fat versions will collapse, leaving you with a soup of chocolate and ice.
There is also a myth that you must use a professional ice cream maker for the layers. This recipe proves that utilizing pre made sandwiches provides a consistent density that is actually harder to achieve by hand at home.
Storage and Waste Reduction
Keep the cake in the freezer in an airtight container. It will stay fresh for up to 2 months. If you notice frost forming on the surface, simply scrape it off with a knife before serving.
To avoid waste, use any leftover stabilized cream as a topping for fresh berries or a dollop on a slice of warm chocolate cake. If you have leftover almond slivers, toast them and store them in a jar for salads.
Suggested Flavor Pairings
The bitterness of the dark chocolate pairs well with items that have high acidity or strong aromatic profiles.
The Tart Contrast
Serve a slice with fresh raspberries or a tart raspberry coulis. The acidity cuts through the heavy fat of the cream and fudge.
The Coffee Pairing
A strong espresso or a dark roast coffee enhances the notes of the 70% chocolate. The heat of the coffee creates a pleasant contrast with the frozen cake.
Alternative Ingredient Swaps
You can easily pivot the flavor of this cake by swapping a few key components.
| Original Ingredient | Substitute | Why It Works |
|---|---|---|
| Dark Chocolate | White Chocolate | Sweeter, creamier profile. Note: Use 10% less maple syrup. |
| Almond Slivers | Crushed Peanuts | Adds a salty crunch. Great for a Peanut Butter Ice Cream Cake style. |
| Greek Yogurt | Coconut Cream | dairy-free alternative. Note: Result is slightly softer. |
If you want a minty version, replace the vanilla extract in the cream layer with a drop of peppermint extract and use mint chocolate chip ice cream sandwiches. For a keto friendly version, ensure the ice cream sandwiches used are sugar-free and replace the maple syrup in the fudge with a sugar-free maple alternative.
Recipe FAQs
How to melt the chocolate for the fudge layer?
Microwave chopped dark chocolate and heavy cream in 30-second intervals. Stir between each session until the mixture becomes glossy and smooth.
How long does the cake need to freeze before slicing?
Chill the cake in the freezer for at least 6 hours. This ensures the fudge and cream layers are fully set for clean slices.
Can I use white chocolate instead of dark chocolate?
Yes, white chocolate creates a creamier profile. Reduce the maple syrup by 10% to balance the extra sweetness; if you enjoy this flavor profile, see how we use a similar balance in our cream cheese variation.
Is it true that I must let the fudge cool completely before pouring?
No, this is a common misconception. Let the fudge cool for only 10 minutes so it is thick but still pourable.
How to stabilize the cream topping?
Beat cold heavy cream, Greek yogurt, monk fruit sweetener, and vanilla on medium high speed. Continue whisking until stiff peaks form.
Can I substitute Greek yogurt for coconut cream?
Yes, coconut cream works as a substitute. It provides a dairy-free alternative while maintaining the necessary structure.
How to prevent the cake from sticking to the pan?
Line a 9x13-inch baking pan with parchment paper. Leave an overhang on the sides to lift the entire cake out easily after it freezes.
Chocolate Fudge Ice Cream Cake

