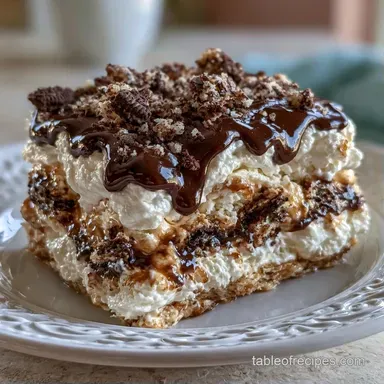
Easy Ice Cream Sandwich Cake with Hot Fudge
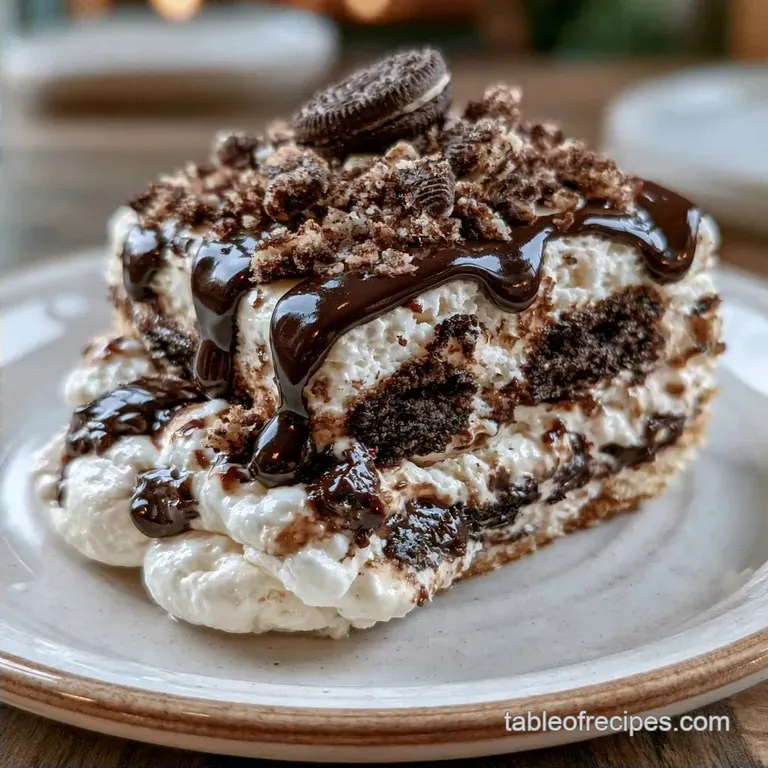
- Time:15 minutes active + 6 hours chilling
- Flavor/Texture Hook: Fudgy, creamy, and chewy
- Perfect for: Large parties or summer potlucks
Easy Ice Cream Sandwich Cake
My first attempt at a homemade ice cream cake was a complete failure. I spent hours baking sponges and whipping cream, but the second I sliced into it, the dessert collapsed like a melting glacier. It was a soggy, runny mess that looked nothing like the professional photos.
I eventually realized that stability and temperature control were the keys. I shifted to using store-bought ice cream sandwiches because their uniform density and built-in wafer "walls" keep the structure intact.
This Easy Ice Cream Sandwich Cake eliminates all that frustration. You get a rich, indulgent result with far less effort, and it actually stays together when you serve it.
Why This Dessert Works
Pre made Structure: Using ice cream sandwiches provides a reliable foundation that won't sag. This is the same logic used in an Oreo Ice Cream Sandwich Cake to keep the layers distinct.
Stabilized Binder: The whipped topping acts as a moisture barrier and adhesive. It seals the fudge so the wafers don't get soggy too quickly.
Thermal Mass: The long freeze time ensures the core temperature drops enough to bond the layers into one solid unit.
| Method | Time | Effort | Texture |
|---|---|---|---|
| Fast (This Recipe) | 15 mins active | Low | Consistent & Firm |
| Classic (Scratch) | 4 hours active | High | Variable & Soft |
Quick Recipe Specs
To get this right, you need to follow the timing. If you cut it too early, you'll have a delicious soup instead of a cake.
- Prep time: 15 minutes
- Cook time: 0 minutes
- Total time: 6 hours 15 mins
- Yield: 12 slices
The Essential Ingredients
Precision here is about using the right fats. Don't swap the whipped topping for plain whipped cream unless you stabilize it with gelatin, or the cake will lean.
| Ingredient | What It Does | Best Swap |
|---|---|---|
| Vanilla Ice Cream Sandwiches (24 units) | Provides the main structure | Mint sandwiches (changes flavor) |
| Hot Fudge Sauce (235ml) | Adds richness and sweetness | Salted caramel (adds saltiness) |
| Whipped Topping (340g) | Binds layers and seals air | Stabilized whipped cream (richer taste) |
| Chocolate Sandwich Cookies (60g, crushed) | Adds a crunchy textural contrast | Crushed walnuts (adds nuttiness) |
| Chocolate Syrup (30ml) | Used for final decorative drizzle | Melted dark chocolate (more intense) |
For the Base & Layers
Use sandwiches that are roughly 70g each. If they are too thin, you'll need more than 24 to fill the pan.
For the Topping & Garnish
The whipped topping should be slightly chilled but spreadable. If it's rock hard, the layers won't bond.
Required Kitchen Tools
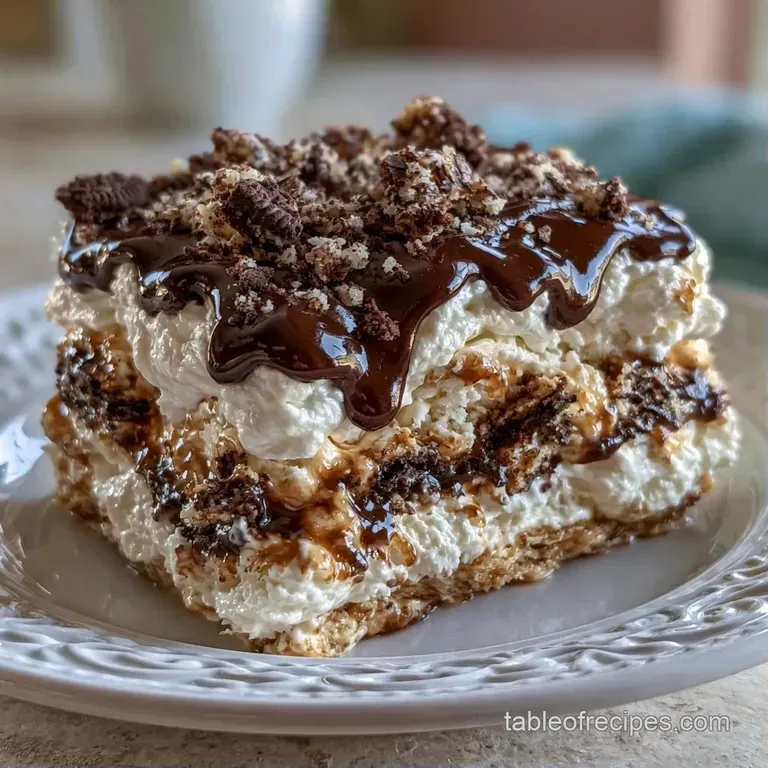
You can use basic equipment, though these particular tools ensure a tidier result.
- 23x23 cm (9x9 inch) square pan: Critical for the proper sandwich size.
- Parchment paper: Absolutely necessary for lifting the cake out.
- Offset spatula: Useful for leveling the whipped topping.
- Sharp knife: Dip in hot water to achieve clean slices.
Simple Assembly Steps
Phase 1: Constructing the Foundation
- Prepare a 23x23 cm pan by lining it with parchment paper, letting the edges hang over the sides to make lifting easier.
- Place a first layer of ice cream sandwiches at the base, pressing them closely together to fill any gaps.
- Evenly drizzle 80ml (about 1/3 cup) of chilled hot fudge over the sandwiches.
- Using a spatula, spread a thin, uniform layer of whipped topping over the fudge.
Phase 2: Building the Height
- Create a second layer of ice cream sandwiches, then repeat with another 80ml of hot fudge and a layer of whipped topping.
- Finish with a final layer of ice cream sandwiches, making sure the top is level.
- Coat the top and sides of the cake with the leftover whipped topping, smoothing it for a polished look.
Phase 3: The Final Set & Finishing
- Decorate by sprinkling crushed chocolate cookies around the perimeter or in a pattern on top.
- For a professional touch, drizzle chocolate syrup over the cookie pieces.
- Freeze the pan for 6 hours until the structure feels solid and doesn't give when pressed.
- Use the parchment edges to lift the cake out, then slice it using a knife dipped in hot water.
Fixing Common Issues
Slices Sliding Apart
This usually happens when the hot fudge is too warm during assembly. The heat melts the edges of the sandwiches, destroying the bond. Always use chilled or room temperature sauce.
Lumpy Top Finish
Cold whipped topping can be stiff and resist smoothing. Let the topping sit at room temperature for 2 minutes before applying it to the final layer.
Soggy Wafer Texture
If the cake stays in the freezer for more than 4 days, the wafers can absorb moisture from the cream. To prevent this, wrap the sliced cake tightly in plastic wrap and foil.
Serving and Slicing
The secret to clean slices is the hot water method. Dip your knife in boiling water, wipe it dry, and make one clean press through the cake.
Chef's Tip: For a more gourmet presentation, serve each slice on a chilled plate with a few fresh raspberries to cut through the richness.
If you want more variety, try a PB Chocolate Ice Cream Cake for a saltier profile.
- Extra crunch? → Double the cookie crumbs.
- Less sweet? → Use dark chocolate fudge.
- Nutty twist? → Fold in 1/4 cup chopped pecans.
Storage and Waste
Place the cake in a sealed container and keep it in the freezer. It remains fresh for about 3 days, after which the texture of the wafers starts to decline.
To avoid waste, stir any leftover cookie crumbs or extra fudge into a vanilla milkshake. This is a great way to ensure no part of your garnish goes unused.
Tasty Recipe Variations
Vegan Alternatives
Substitute the vanilla sandwiches with coconut based options and a plant based whipped topping. The stability remains identical, although the flavor becomes nuttier.
Minty Variation
Swap vanilla for mint chocolate chip ice cream sandwiches. Mint and hot fudge are a timeless duo that complements the topping's silky consistency.
Strawberry Shortcake Style
Trade the hot fudge for strawberry preserves and use crushed shortbread instead of chocolate cookies for a more refreshing, fruit forward treat.
Fact Checking the "From Scratch" Idea
Some believe homemade layers improve the cake. In fact, store-bought sandwiches feature stabilizers that keep the dessert from collapsing into a puddle while slicing.
Another misconception is that a 1-hour flash freeze is sufficient. It isn't; the internal temperature must drop significantly to fuse the layers, otherwise the cake may slide.
Recipe FAQs
How to assemble this ice cream sandwich cake?
Layer ice cream sandwiches, hot fudge, and whipped topping in a parchment lined 9x9 pan. Repeat this sequence three times and freeze for at least 6 hours to set the structure.
How many sandwiches are required for a standard pan?
Use 24 vanilla ice cream sandwiches. This specific quantity ensures three full layers in a 9x9 inch pan with no gaps between the pieces.
What method ensures the cleanest slices?
Dip your knife in hot water between every cut. This slightly melts the edges and prevents the whipped topping and ice cream from sticking to the blade.
Can I use a different pan size?
Yes, but you must adjust the sandwich count. A larger pan requires more ingredients to maintain the height, similar to the assembly of a pudding sandwich cake.
Is it true the cake is ready after one hour?
That's a myth. The dessert requires at least 6 hours in the freezer to become firm enough to be lifted by the parchment handles and sliced.
Which toppings add the best crunch?
Sprinkle crushed chocolate sandwich cookies over the top. This creates a decorative finish and adds a crisp texture to contrast the creamy layers.
Where should leftovers be stored?
Keep the cake in a sealed container inside the freezer. It will remain fresh for about 3 days before the wafers start to degrade.
Easy Ice Cream Sandwich Cake