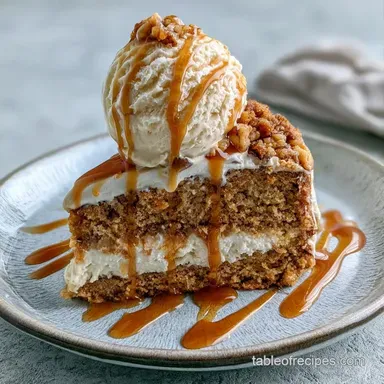
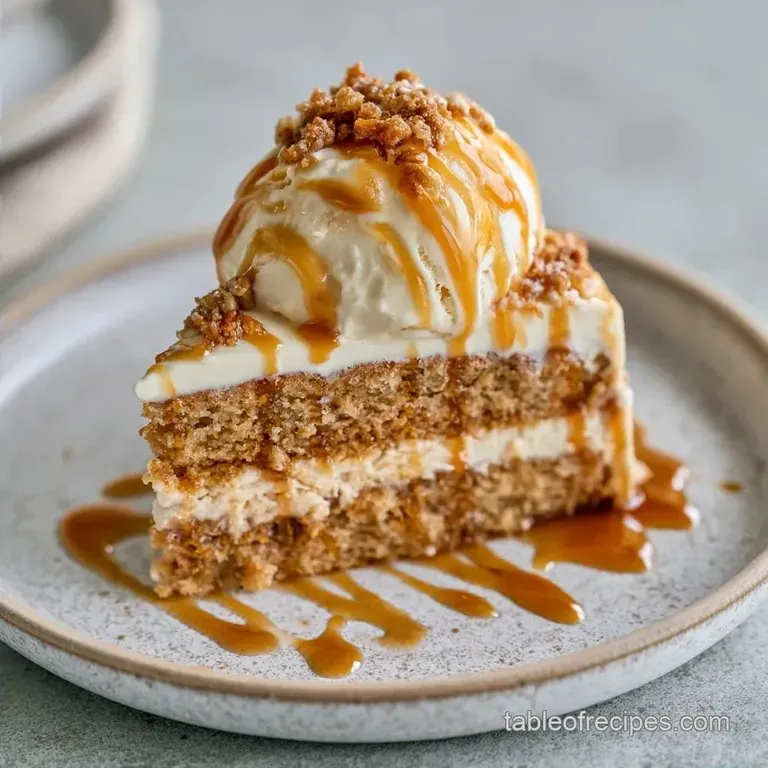
Butterscotch Pudding Ice Cream Cake with Brown Sugar
- Time: 15 min active + 6 hours 50 mins total
- Flavor/Texture Hook: Deep caramelized sugar with a fluffy, frozen finish
- Perfect for: Birthday parties or nostalgic family gatherings
- Butterscotch Pudding Ice Cream Cake
- Why the Texture Stays Stable
- What Each Ingredient Does
- The Required Ingredients
- Essential Kitchen Tools
- Making the Dessert
- Fix Common Errors
- Flavor Twists
- Adjusting the Batch Size
- Debunking Dessert Myths
- Storage and Leftovers
- Serving This Cake
- Recipe FAQs
- 📝 Recipe Card
Butterscotch isn't just a flavor, it's a piece of Americana. It reminds people of old school soda fountains and the kind of desserts that used to take all day to make from scratch. For many, it evokes memories of grandmother's kitchen where the smell of browning butter filled every room.
The appeal here is the contrast. You have the warmth of a baked cake meeting the chill of an ice cream layer. It's a heavy hitter, but the salt in the butterscotch keeps it from being cloying.
When you put together a Butterscotch Pudding Ice Cream Cake, you're essentially building a structural dessert. The cake base needs to be sturdy enough to hold the weight of the ice cream without becoming a soggy mess.
Butterscotch Pudding Ice Cream Cake
Right then, let's get into the specifics. This isn't a "wing it" kind of recipe. Baking is chemistry, and when you're layering frozen elements on top of baked ones, precision matters. If your cake is too moist, the ice cream will sink. If it's too dry, it'll crumble when you slice it.
The goal is a dense, buttery crumb that acts as a foundation. We use instant pudding mix in the batter not just for flavor, but because the modified cornstarch in the mix helps stabilize the cake structure.
But what about the topping? That's where we move from baking to aeration. We're folding whipped cream into a pudding ice cream mixture. This creates a texture that's lighter than pure ice cream but more stable than a mousse. Trust me on this, don't skip the chilling time, or you'll end up with a butterscotch soup.
Why the Texture Stays Stable
Starch Stabilization: The instant pudding mix contains thickeners that bind with the flour, preventing the cake from collapsing under the heavy ice cream.
Air Incorporation: Folding whipped cream into the ice cream creates tiny air pockets, which stops the topping from freezing into a solid, icy block.
Fat Barrier: The melted butter in the crust creates a moisture barrier, so the ice cream doesn't soak into the cake during the 6 hour set.
| Base Method | Prep Time | Texture | Best For |
|---|---|---|---|
| Baked Oven Base | 15 min | Sturdy and crumbly | Heavy toppings |
| No Bake Crust | 10 min | Dense and chewy | Light mousses |
| Stovetop Custard | 45 min | Soft and creamy | Individual jars |
What Each Ingredient Does
| Ingredient | What It Does | Best Swap |
|---|---|---|
| Butterscotch Pudding Mix | Adds flavor and stabilizes crumb | Brown sugar + cornstarch (complex) |
| Light Brown Sugar | Provides moisture and molasses notes | Dark brown sugar (richer flavor) |
| Heavy Whipping Cream | Adds aeration and volume | Full fat coconut cream (nutty) |
| Vanilla Bean Ice Cream | Provides the frozen structure | Butter pecan ice cream (nutty) |
The Required Ingredients
For the cake base: - 1.5 cups all purpose flour Why this? Provides the primary structure for the base - 1 box (3.4 oz) instant butterscotch pudding mix Why this? Stabilizes the crumb and adds flavor - 0.75 cup light brown sugar, packed Why
This? Adds moisture and depth - 1 tsp baking powder - 0.5 tsp baking soda - 0.25 tsp salt - 0.5 cup unsalted butter, melted Why this? Creates a rich, tender crumb - 2 large eggs - 0.75 cup whole milk - 1 tsp vanilla extract
For the filling and topping: - 1 pint vanilla bean ice cream, softened Why this? Forms the frozen body of the cake - 1 package (3.4 oz) instant butterscotch pudding mix Why this? Thickens the ice cream layer - 1 cup heavy whipping cream, cold
Why this? Adds air for a lighter feel - 1 cup cold whole milk - 0.5 cup butterscotch chips - 2 tbsp heavy cream - 1 pinch flaky sea salt
Essential Kitchen Tools
You'll need a 9 inch springform pan. This is non negotiable. Trying to lift a frozen ice cream cake out of a standard cake pan is a recipe for disaster. You also need a rubber spatula for the folding process. Using a whisk here would deflate the whipped cream and ruin the aeration.
I recommend a chilled metal bowl for whipping the cream. If the bowl is warm, the fat in the cream won't hold air as well, and you'll get a runny topping. A handheld mixer works, but a stand mixer such as KitchenAid is faster.
Making the Dessert

Phase 1: Baking the Golden Base
- Preheat your oven to 350°F (175°C). Grease a 9 inch springform pan and line the bottom with parchment paper. Note: The paper prevents the bottom from sticking during the freeze.
- In a large bowl, whisk together the flour, one box of pudding mix, brown sugar, baking powder, baking soda, and salt.
- Stir in melted butter, eggs, milk, and vanilla until the batter is smooth.
- Pour into the pan and bake for 25-30 minutes until a toothpick comes out clean and the edges are a deep golden brown.
- Let the cake cool completely in the pan before adding the next layer. Note: Adding ice cream to a warm cake will melt the topping instantly.
Phase 2: Folding the Creamy Filling
- In a chilled bowl, whip the heavy cream until stiff peaks form.
- In a separate bowl, whisk the cold milk and the second package of instant pudding mix for 2 minutes until thickened. Note: This creates a silky base for the ice cream.
- Gently fold the softened vanilla ice cream into the thickened pudding.
- Slowly fold in the whipped cream using a rubber spatula; do not overmix. Note: Overmixing removes the air pockets, making the cake too dense.
- Spread the mixture evenly over the cooled cake base and smooth the top.
Phase 3: The Deep Freeze and Finish
- Refrigerate for at least 6 hours to set. Note: This allows the layers to bond together.
- Melt butterscotch chips with 2 tbsp heavy cream in a microwave safe bowl, drizzle over the chilled cake, and finish with a pinch of flaky sea salt.
Fix Common Errors
The most frequent issue I see is a "soupy" middle. This usually happens because the ice cream was too soft or the cake was still warm. When these two meet, you get a layer of liquid that never quite sets. For a denser filling, a cream cheese ice cream cake provides more structural support, but for this Butterscotch Pudding Ice Cream Cake, temperature control is the only way to win.
Another issue is the "crumbled edge." This happens if you try to remove the springform ring before the cake is fully chilled. The ice cream acts as a glue, and if it's not set, it pulls the cake apart.
Troubleshooting Guide
| Problem | Root Cause | Solution |
|---|---|---|
| Topping is runny | Not enough chilling time | Freeze for another 2 hours |
| Cake base is soggy | Cake was warm when topped | Ensure cake is room temp or cold |
| Topping has ice crystals | Over mixed whipped cream | Fold gently with a spatula |
Flavor Twists
If you want to shift the flavor profile, you can swap the vanilla bean ice cream for something more aggressive. Butter pecan is a natural fit here. It adds a nutty crunch that breaks up the smoothness of the pudding.
For a salty sweet twist, you can add a layer of salted caramel between the cake and the ice cream. Just make sure the caramel is cooled first. If you're looking for something completely different, you could try a chocolate pudding cake for a richer, darker contrast.
For an adult celebration, a tablespoon of bourbon stirred into the butterscotch drizzle adds a smoky depth that cuts through the sugar. If you want a lighter texture, you can replace the whole milk in the filling with half and half, though it will be richer.
Adjusting the Batch Size
If you need to scale this down for a smaller crowd, use a 6 inch springform pan. Reduce the bake time by about 20% and keep a close eye on the toothpick test. For the eggs, beat one egg in a small bowl and use exactly half of it.
Scaling up for a party requires more care. If you move to a 12 inch pan, lower the oven temperature to 325°F (160°C) and extend the bake time. This prevents the edges from burning before the center is set.
Increase your salt and spices by only 1.5x rather than doubling them, as these flavors can become overwhelming in larger volumes.
| Scale | Pan Size | Temp Change | Time Change |
|---|---|---|---|
| Half Batch | 6 inch | No change | -20% bake time |
| Double Batch | 12 inch | -25°F | +15-20% bake time |
Debunking Dessert Myths
One common misconception is that all ice cream cakes need a frozen crust. Some people think you have to freeze the base first. In reality, a baked base provides a textural contrast that a frozen one lacks. The slight chew of the cake makes the ice cream feel creamier.
Another myth is that instant pudding is only for people who don't know how to cook. In professional settings, modified starches are used to keep desserts stable under heat or cold. The pudding mix here isn't just for flavor, it's a stabilizer that prevents the ice cream from separating.
Storage and Leftovers
This cake lives in the freezer, but it shouldn't be stored uncovered. Use a plastic wrap or an airtight container to prevent freezer burn. It stays good for up to 2 months in the freezer.
If you have leftover butterscotch drizzle, don't toss it. Keep it in a small jar in the fridge. It's great on waffles or stirred into oatmeal. If you have leftover heavy cream from the whipping process, use it for your morning coffee.
When reheating isn't an option (obviously), the key is the thaw. Take the cake out of the freezer 15-20 minutes before serving. This allows the cake base to soften slightly while the ice cream remains firm, making it much easier to slice.
Serving This Cake
To get those clean, professional looking slices, dip your knife in hot water and wipe it dry between every single cut. The heat slices through the frozen layer without dragging the cake crumbs upward.
Serve each slice with a fresh berry, like a raspberry or a blackberry. The acidity of the fruit cuts through the richness of the butterscotch. Since the Butterscotch Pudding Ice Cream Cake is so decadent, a small slice is usually enough.
Honestly, don't even bother with low-fat substitutions here. This is a dessert designed for indulgence. The fat in the heavy cream and butter is what carries the butterscotch flavor to your taste buds. If you strip that out, you're just eating cold sugar. Enjoy it as it is, and maybe take a walk afterward.
Recipe FAQs
Can I add butterscotch pudding to a standard cake mix?
Yes, you can. Mixing one box of instant pudding into your batter increases moisture and creates a deeper butterscotch flavor.
How to make an ice cream cake with a pudding base?
Bake a cake base at 350°F and let it cool completely before layering it with a mixture of folded whipped cream, softened ice cream, and thickened pudding.
How to turn instant pudding into a creamy ice cream layer?
Whisk cold milk and pudding mix for two minutes until thickened, then gently fold in softened vanilla bean ice cream and stiff peaked whipped cream.
Is it true the cake base must be frozen before adding the topping?
No, this is a common misconception. The cake base only needs to be room temperature or cold; however, adding topping to a warm cake will make the base soggy.
Why is my butterscotch drizzle runny?
The cake likely needs more chilling time. Place the cake back in the freezer for another 2 hours to allow the topping to set firmly.
How to store this cake to prevent freezer burn?
Wrap the cake in plastic wrap or place it in an airtight container. This preserves the texture for up to 2 months in the freezer.
Can I substitute a no-bake crust for the baked base?
Yes, a chilled crust works well. If you prefer a non-baked option, the same layering logic applies to our pudding ice cream sandwich style desserts.
Butterscotch Pudding Ice Cream Cake