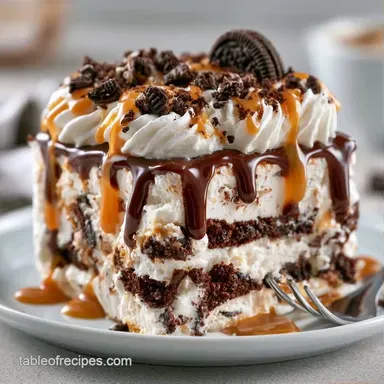
No Bake Loaded Cool Whip Ice Cream Cake

- Time: 15 min active + 6 hours 15 mins chilling
- Flavor/Texture Hook: Fudgy, crunchy, and cold
- Perfect for: Family reunions or summer potlucks
Imagine a humid July afternoon with the backyard full of noise. The grill is humming, and the kids are drenched in pool water. You need a dessert that doesn't melt into a puddle the second it hits the table. This is where the heavy hitter comes in.
I used to think you needed a professional pastry setup for a dessert like this. I was wrong. It turns out that using pre made components actually helps with the structural integrity. You just need the right ratios to keep it from becoming a sugary mess.
The Loaded Cool Whip Ice Cream Cake relies on a specific layering logic. By alternating frozen sandwiches with stabilized cream, you create a dessert that holds its shape even in the heat. It's a crowd pleaser that takes almost no actual cooking.
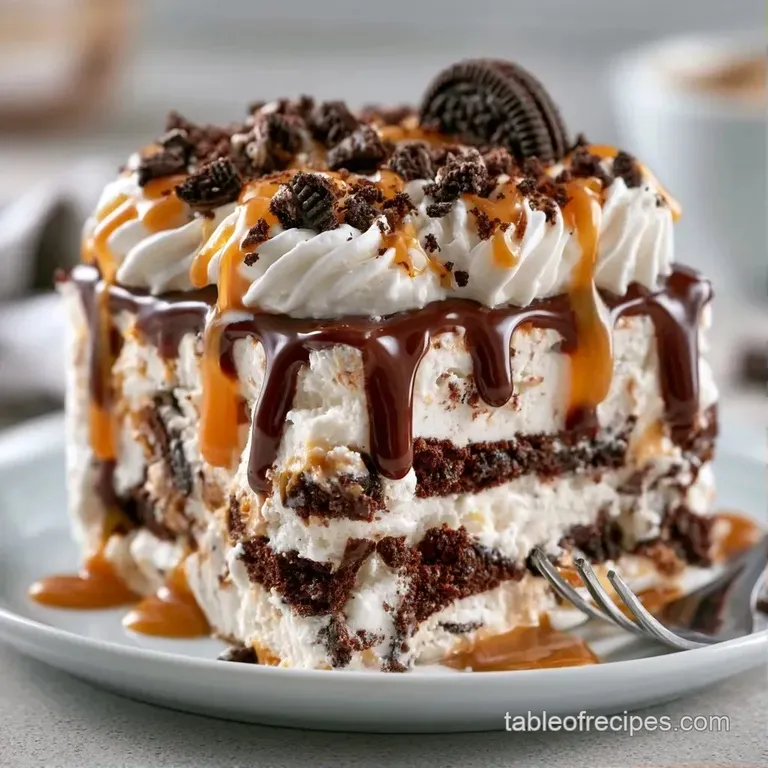
Loaded Cool Whip Ice Cream Cake
The logic here is all about temperature and stability. Since we aren't baking anything, we are essentially managing a series of freezing points.
- Stabilized Air
- Cool Whip contains stabilizers that keep it from collapsing under the weight of the ice cream.
- Sugar Concentration
- The fudge and caramel have high sugar levels, which lowers their freezing point so they stay slightly soft even at 0°F.
- Surface Area
- Breaking the sandwiches to fill gaps eliminates air pockets that cause the cake to lean.
| Fresh Components | Shortcut Components | Impact | Savings |
|---|---|---|---|
| House made Ice Cream | store-bought Sandwiches | Faster assembly, consistent thickness | 2 hours time |
| Whipped Heavy Cream | Stabilized Cool Whip | Better structural hold, no weeping | Higher stability |
| Homemade Ganache | Jarred Hot Fudge | Predictable viscosity, faster set | 30 mins time |
Precision Logic Behind The Build
| Ingredient | What It Does | Best Swap |
|---|---|---|
| Ice Cream Sandwiches | Provides the frozen structural base | Ice cream slices |
| Cool Whip | Acts as a moisture barrier and glue | Stabilized whipped cream |
| Hot Fudge | Adds dense, fudgy sweetness | Melted chocolate |
The Exact Ingredient List
- 24 standard size ice cream sandwiches Why this? Consistent thickness for layering.
- 16 oz Cool Whip, thawed Why this? Holds shape better than fresh cream.
- 1 cup hot fudge sauce Why this? High viscosity prevents leaking.
- 1/2 cup caramel sauce Why this? Adds a salty sweet contrast.
- 1 cup crushed Oreo cookies Why this? Adds a necessary crunch.
- 1/2 cup mini chocolate chips Why this? Small size ensures even distribution.
- 1/4 cup rainbow sprinkles Why this? Visual contrast and texture.
Substitutions:
- Ice cream sandwiches: Use sliced frozen ice cream cakes.
- Cool Whip: Use any stabilized non dairy topping.
- Oreo cookies: Use crushed graham crackers for a honey flavor.
- Hot fudge: Use chocolate syrup, though it is thinner.
- Caramel sauce: Use butterscotch sauce.
- Mini chocolate chips: Use chopped walnuts for nuttiness.
- Rainbow sprinkles: Use colored sugar or sanding sugar.
Tools for a Clean Cut
You don't need a fancy kitchen, but a few specific tools make the process smoother. A 9x13 inch baking pan is the standard here. I highly recommend using parchment paper. Let it hang over the edges so you can lift the whole cake out without fighting the pan.
An offset spatula is the real hero. It lets you spread the whipped topping from edge to edge without leaving gaps. If you don't have one, a flat butter knife works, but it takes more effort to get a level surface.
Finally, keep a large knife in a tall glass of hot water. Dip the knife, wipe it dry, and slice. This ensures you get clean edges instead of smearing the layers together.
Assembly From Start to Finish
- Line a 9x13 inch baking pan with parchment paper, leaving an overhang on the sides for easy lifting.
- Arrange ice cream sandwiches in a single layer at the bottom. Break sandwiches into smaller pieces to fill any gaps completely to create a seamless base.
- Spread 4 oz of thawed Cool Whip evenly over the ice cream sandwich base using an offset spatula.
- Drizzle the hot fudge and caramel sauce in a zigzag pattern across the whipped topping.
- Evenly scatter the crushed Oreos, mini chocolate chips, and rainbow sprinkles over the sauces.
- Apply another 4 oz of Cool Whip to lock the toppings in place.
- Add a second layer of ice cream sandwiches, followed by another layer of Cool Whip.
- Spread the final 8 oz of Cool Whip over the top, smoothing it to the edges.
- Garnish the top with a final drizzle of fudge and a sprinkle of cookies.
- Cover tightly with plastic wrap and freeze for at least 6 hours until the center is firm to the touch.
Chef's Note: For a cleaner look, freeze the cake for 30 minutes before adding the final garnish of fudge. This prevents the drizzle from sinking into the cream.
Solving Structural Failures
When you're building a Loaded Cool Whip Ice Cream Cake, the biggest enemy is temperature. If the sandwiches soften too much during assembly, they'll slide.
The Mushy Middle
This usually happens if the cake didn't freeze long enough or if the fudge was too hot when added. The sauces can create "melt zones" that prevent the cake from setting.
The Slumping Slice
If the cake leans when you cut it, you likely had gaps in the base layer. Air pockets provide no support, causing the weight of the top layers to push the cake sideways.
The Gapping Base
When the ice cream sandwiches aren't pressed firmly together, the cream seeps down. This creates a layered look but can make the bottom unstable.
| Problem | Root Cause | Solution |
|---|---|---|
| Layers sliding | Topping too warm | Freeze for 2 hours between layers |
| Sogginess | Too much sauce | Use a drizzle, not a pour |
| Uneven slices | Dull or cold knife | Dip knife in hot water |
Swaps for Different Diets
If you're catering to a crowd with different needs, you can adjust the components without ruining the chemistry. For a dairy-free version, swap the sandwiches for coconut based ice cream sandwiches and use a vegan whipped topping.
If you want a version that's a bit lighter on the mix ins, try a Cream Cake for 16 recipe. For those who love a thicker, custard like middle, my Sandwich Cake for 12 recipe is a great alternative.
Decision Shortcut:
- Want more crunch? Increase Oreo count to 1.5 cups.
- Want a saltier profile? Use sea salt caramel.
- Serving more than 12? Double the ingredients and use a deeper pan.
Storage and Waste Reduction
Keep this cake in the freezer, tightly wrapped in plastic or in an airtight container. It stays fresh for up to 2 months. If you leave it in the fridge, it will collapse within 20 minutes, so avoid thawing it.
To reduce waste, don't toss the broken bits of ice cream sandwiches. Toss them into a bowl with a splash of milk for a quick "deconstructed" dessert. If you have leftover Cool Whip, fold it into fresh berries for a fast topping.
Best Side Pairings
Since this dessert is very rich and sweet, pair it with something that cuts through the fat. A platter of fresh raspberries or sliced Granny Smith apples provides a tart contrast that cleanses the palate.
If you want to turn it into a full dessert spread, serve it alongside a pot of strong, bitter coffee. The acidity of the coffee balances the creamy sweetness of the Loaded Cool Whip Ice Cream Cake, making it feel less heavy.
Precision Checkpoints:
- Temp Check: Ensure Cool Whip is thawed to room temperature before spreading.
- Time Check: Freeze for exactly 6 hours minimum; 12 hours is better for stability.
- Fit Check: Use a 9x13 pan; any larger and the layers will be too thin.
Recipe FAQs
How to make ice cream cake with Cool Whip?
Layer ice cream sandwiches in a parchment lined 9x13 pan. Spread thawed Cool Whip, drizzle sauces, add toppings, and repeat the process before freezing for at least 6 hours.
Can I use Cool Whip as frosting for ice cream cake?
Yes, it is the best choice. Its stability when frozen prevents the frosting from becoming too icy or collapsing compared to fresh whipped cream.
When to put Cool Whip on ice cream cake?
Spread it between every layer of ice cream sandwiches. This creates a stable bond and prevents the fudge and caramel sauces from soaking into the cake base.
How to make an Oreo ice cream cake?
Scatter crushed Oreo cookies over the sauce layers. If you enjoyed building these textures, the same no-bake layering logic applies to our ice cream sandwich dessert.
How to make an ice cream cake?
Arrange ice cream sandwiches in a single layer at the bottom of a pan. Build tiers of Cool Whip, fudge, caramel, and toppings, then freeze overnight for a firm set.
Is it true that this cake can be thawed in the refrigerator?
No, this is a common misconception. This cake will collapse within 20 minutes if placed in the fridge; store it exclusively in the freezer for up to 2 months.
How to get clean slices when serving?
Dip a sharp knife in hot water between every cut. This prevents the Cool Whip and ice cream from sticking to the blade and smudging the layers.
Loaded Cool Whip Ice Cream Cake