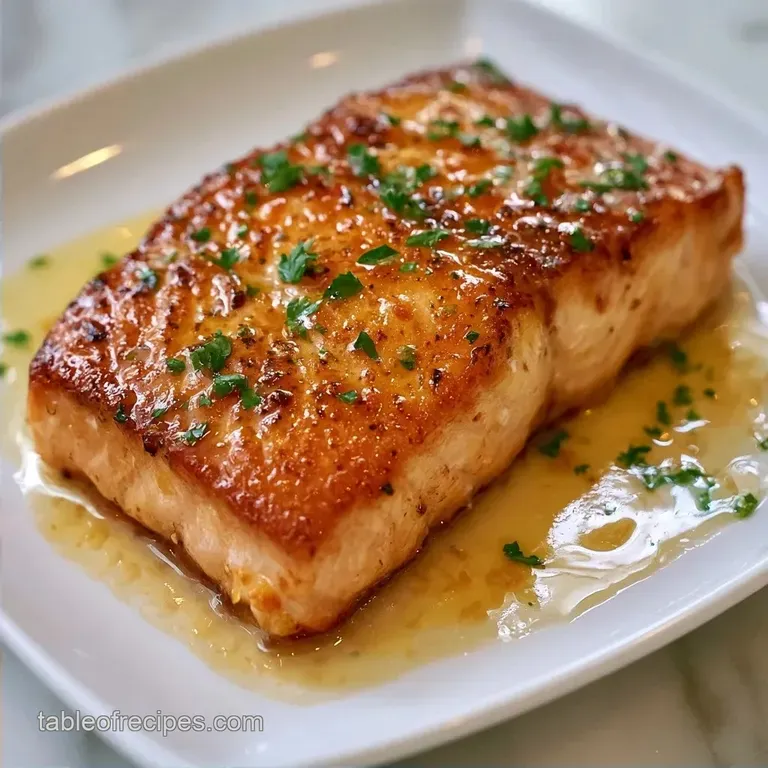
Stovetop Salmon Fillet: Crispy Skin and Tender Center
- Time: 5 min active + 10 min cooking = Total 15 minutes
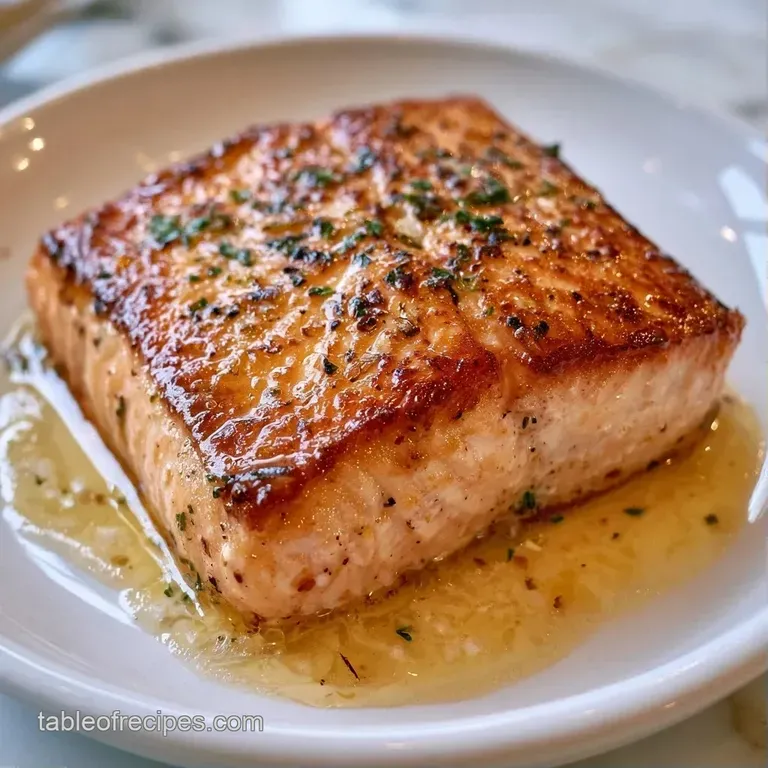
- Flavor/Texture Hook: Mahogany crisp skin with a buttery, tender center
- Perfect for: High protein weeknight dinners or a fast, low effort date night
- The Best Stovetop Salmon Fillet
- Quick Searing Techniques
- Essential Recipe Specs
- The Basic Components
- Best Tools For Searing
- The Step-By-Step Process
- Common Pitfalls
- Troubleshooting Common Issues
- Custom Flavor Ideas
- Adjusting the Batch Size
- Storing Your Fish
- Plating and Serving
- Common Misconceptions
- Recipe FAQs
- 📝 Recipe Card
The Best Stovetop Salmon Fillet
That loud, crackling sizzle the second the skin hits the hot oil is the only sound I want to hear on a Tuesday night. I remember the first time I tried to do this, I just tossed the fish in the pan and ended up with a sticky, gray mess that clung to the metal for dear life.
I spent ten minutes scrubbing the pan only to realize I'd forgotten the most basic rule: water is the enemy of the sear.
Once I started patting the skin dry like my life depended on it, everything shifted. Now, this is my go to move when I want something that feels fancy but takes less time than ordering takeout. You get that rich, salty crust and a center that just melts, all without turning on the oven and heating up the whole house.
Expect a process that is lean and fast. We aren't doing any complicated reductions or tedious prep here. We are focusing on heat, fat, and timing to get a Stovetop Salmon Fillet that rivals any steakhouse version. It's all about the confidence to leave the fish alone once it hits the pan.
Quick Searing Techniques
When you're rushing through a workday, you don't have time for guesswork. The secret to this recipe isn't a fancy tool, but how you handle the heat. If you want to understand the broader logic of over high heat seafood, checking out a pan seared salmon guide can help you see how different fats change the outcome.
Dry Surface: Moisture on the skin creates steam, which boils the fish instead of searing it. Patting it dry ensures the skin hits the oil and browns instantly.
Constant Pressure: Salmon curls as the proteins tighten in the heat. Pressing down for the first minute locks the skin against the pan for edge to edge crispness.
Temperature Carryover: The fish keeps cooking after you pull it off the heat. Removing it a few degrees early prevents that dry, chalky texture.
Fat Layering: Starting with oil handles the high heat, while adding butter at the end provides that velvety finish and nutty aroma.
| Method | Time | Texture | Best For |
|---|---|---|---|
| Stovetop | 15 mins | Shatter crisp skin | Weeknights |
| Oven Baked | 20 mins | Uniformly soft | Large batches |
| Air Fryer | 12 mins | Slightly dried | Meal prep |
Essential Recipe Specs
To get the results you want, you have to understand what each ingredient is actually doing in the pan. We aren't just adding things for flavor; each one has a job to do to ensure the Stovetop Salmon Fillet doesn't stick or overcook.
| Ingredient | Science Role | Pro Secret |
|---|---|---|
| Kosher Salt | Draws moisture | Salt the flesh side only to keep skin dry |
| Olive Oil | High heat conduction | Use a high smoke point oil to avoid bitterness |
| Butter | Flavor and browning | Add at the very end to prevent burning |
The Basic Components
For this recipe, keep it simple. Don't bother with low-fat alternatives; the fat is what protects the fish from the intense heat of the skillet.
- 4 salmon fillets, 6 oz (170g) each, skin on Why this? Skin on protects the flesh and provides the best texture
- 1 tsp (6g) kosher salt Why this? Larger grains are easier to distribute evenly
- ½ tsp (1g) freshly cracked black pepper Why this? Freshly cracked has more volatile oils for better aroma
- ½ tsp (1g) garlic powder Why this? Fresh garlic burns too quickly at these temperatures
- 1 tbsp (15ml) extra virgin olive oil Why this? Provides a stable base for the initial sear
- 1 tbsp (14g) unsalted butter Why this? Adds richness and a nutty finish to the flesh
| Original Ingredient | Substitute | Why It Works |
|---|---|---|
| Olive Oil | Avocado Oil | Higher smoke point. Note: More neutral flavor than olive oil |
| Butter | Ghee | Higher heat tolerance. Note: Lacks the milky sweetness of butter |
| Garlic Powder | Onion Powder | Similar savory depth. Note: Slightly sweeter, less pungent |
Best Tools For Searing
You don't need a kitchen full of gadgets, but the pan choice is non negotiable. I always reach for a 12 inch cast iron skillet because it holds heat like a beast. When you drop a cold piece of fish into a thin pan, the temperature crashes, and you lose that sizzle.
If you don't have cast iron, a heavy bottomed stainless steel pan is your next best bet. Avoid non stick pans if you can. While they seem easier, they often can't handle the high heat needed for a true skin shatter, and the coatings can degrade.
A flexible fish spatula is the only other "must have." It allows you to get under the skin without tearing the delicate flesh. If you're using a standard spatula, just be extra gentle during the flip.
The step-by-step Process
Right then, let's get into the actual cooking. Trust the timing, but use your eyes and ears more than the clock.
- Remove fillets from the fridge 15 minutes before cooking to take the chill off. Note: Cold fish shocks the pan and causes sticking
- Use paper towels to pat the skin side of the salmon completely dry. Note: This is the most important step for crispiness
- Season the flesh side of the fillets generously with salt, pepper, and garlic powder.
- Place a 12 inch cast iron skillet or heavy bottomed stainless steel pan over medium high heat and add the olive oil.
- Once the oil shimmers, place the fillets in the pan skin side down.
- Use a spatula to press firmly on each fillet for 30-60 seconds. Note: This stops the fish from curling
- Leave the salmon undisturbed for 5-6 minutes until the skin is mahogany colored and releases easily from the pan.
- Add the butter to the pan and carefully flip the fillets.
- Sear the flesh side for 2-3 minutes until it feels firm to the touch.
- Remove the fillets when the internal temperature reaches 125°F (52°C) for medium rare or 135°F (57°C) for medium.
Common Pitfalls
Most people struggle with a Stovetop Salmon Fillet because they are too timid with the heat or too impatient with the flip. If you try to move the fish before it's ready, the skin will tear and stay in the pan.
Troubleshooting Common Issues
| Issue | Solution |
|---|---|
| Why Your Salmon Stuck | This usually happens because the pan wasn't hot enough or the skin was damp. When the pan is hot, the fish creates its own "steam barrier" that eventually releases the skin. |
| Why Your Salmon Has White Gunk | That white stuff is called albumin. It's just protein that pushes out when the fish is cooked too fast or too long. It's safe to eat, but not pretty. |
| Why Your Skin Isn't Crispy | If the skin is soft, you likely crowded the pan. When you put too many fillets in at once, the pan temperature drops and the fish steams in its own juices. Work in batches if you have a small skillet. |
Quick Check for Success:
- ✓ Skin was patted dry with a paper towel.
- ✓ Fillets sat at room temperature for 15 mins.
- ✓ Pan was shimmering hot before adding fish.
- ✓ No flipping occurred for the first 5 minutes.
- ✓ Internal temperature verified with a probe.
Custom Flavor Ideas
While the basic version is a winner, you can easily tweak this to fit your mood. Since this is a low effort meal, don't overcomplicate the additions.
For a Zesty Twist Squeeze half a lemon over the fillets immediately after removing them from the pan. The acid cuts through the richness of the butter and brightens the whole dish.
For a Mediterranean Profile Add a pinch of dried oregano to your seasoning mix and toss a few halved cherry tomatoes into the pan during the last 2 minutes of cooking.
For a dairy-free Version Swap the butter for a tablespoon of vegan butter or just use an extra splash of olive oil. According to Serious Eats, using a high smoke point oil is the key to maintaining the sear without the need for dairy.
Adjusting the Batch Size
When you're cooking for one or a crowd, the physics of the pan change. You can't just multiply everything and expect the same result.
Scaling Down If you're just making one fillet, use a smaller pan (8 inch) to keep the oil concentrated. Reduce the total cooking time by about 20% because a single fillet doesn't drop the pan temperature as much as four do.
Scaling Up For 8 fillets, do not try to jam them all in one pan. Work in two batches. If you overload the pan, the temperature will plummet, and you'll end up with poached salmon instead of a seared Stovetop Salmon Fillet.
Seasoning Adjustments When doubling the recipe, only increase the salt and garlic powder by 1.5x. Spices can become overwhelming when scaled linearly, and you want the taste of the fish to remain the star.
Storing Your Fish
If you have leftovers, be careful with how you handle them. Reheating fish can easily turn it into rubber if you aren't cautious.
Fridge & Freezer Store cooked salmon in an airtight container in the fridge for up to 3 days. I don't recommend freezing already cooked salmon, as the texture becomes mealy and the skin loses its shatter.
The Gentle Reheat Avoid the microwave at all costs. Instead, put the fillet in a toaster oven or a over low heat skillet for 2-3 minutes just to take the chill off. This preserves the velvety texture of the center.
Zero Waste Tips Don't throw away the leftover butter in the pan. It's infused with salmon and garlic. Pour it over some steamed vegetables or use it to toast a piece of sourdough. If you have salmon scraps, toss them into a corn chowder for extra depth.
Plating and Serving
The way you serve this dish determines if it feels like a quick meal or a restaurant experience. I like to keep the plate clean so the mahogany skin really pops.
Place the fillet skin side up on the plate. This ensures the skin stays crispy and doesn't get soggy from the juices on the plate. For a side, I highly recommend my honey butter corn, which complements the richness of the salmon perfectly.
Decision Shortcut:
- If you want a light meal, pair with a lemon arugula salad.
- If you want comfort, serve over mashed potatoes or risotto.
- If you're meal prepping, pair with quinoa and roasted asparagus.
Common Misconceptions
There are a few things people tell you about searing fish that just aren't true. Let's set the record straight so you don't waste your time.
The "Sealing" Myth Many believe searing "seals in the juices." This is false. Searing creates a crust for flavor and texture, but moisture loss happens throughout the cooking process. The goal is temperature control, not "sealing."
The "Pressing" Fear Some cooks say you should never press the fish because it "squeezes out the juices." In reality, pressing for the first 60 seconds only affects the skin's contact with the pan. It doesn't ruin the interior of the Stovetop Salmon Fillet.
The "Cold Pan" Strategy Some suggest starting fish in a cold pan to render fat. While this works for duck breast, it's a disaster for salmon. You need that initial heat shock to get the skin to shatter.
Recipe FAQs
How to properly cook salmon on the stovetop?
Pat the skin side dry and sear skin side down in shimmering oil. Press firmly with a spatula for 30 60 seconds to prevent curling, then cook undisturbed for 5 6 minutes before flipping to finish the flesh side.
Can you eat salmon with albumin?
Yes, it is completely safe to eat. Albumin is just a protein that pushes out of the fillet when the fish is cooked too fast or for too long.
How to cook salmon for a diabetic?
Stick to the basic seasoning of salt, pepper, and garlic powder. This method avoids added sugars and relies on healthy fats from olive oil, making it a naturally safe option for blood sugar management.
Is stovetop salmon good for high blood pressure?
Yes, salmon is heart healthy due to its omega-3 fatty acids. Just be mindful of the amount of kosher salt used to align with your specific sodium restrictions.
How to cook salmon fillets in the oven instead?
Preheat your oven and bake on a parchment lined sheet. While roasting is convenient for larger groups, the stovetop method provides a much crispier skin and better texture control.
Why does salmon skin stick to the pan?
This occurs if the skin was damp or the pan wasn't hot enough. When the oil is shimmering and the skin is dry, the fish creates a steam barrier that allows it to release easily.
What is a simple and delicious way to serve this salmon?
Pair it with a light, nutrient dense side. This fillet complements the fresh flavors of Mason Jar Salads for a complete, healthy meal.
Stovetop Salmon Fillet

