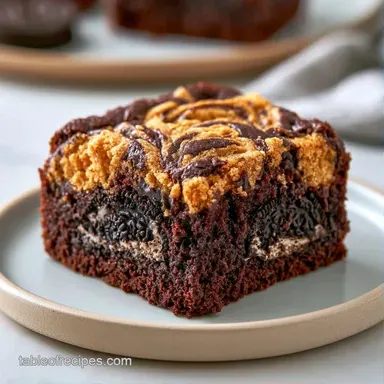
Oreo Chocolate Chip Brookies in 45 Minutes
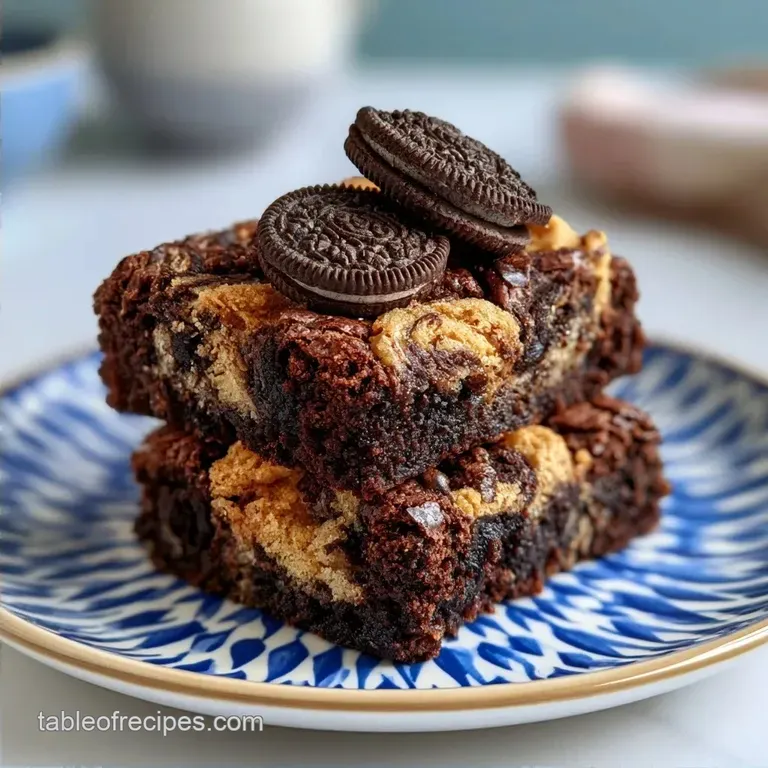
- Time: 20 min active + 25 min baking
- Flavor/Texture Hook: Fudgy brownie bottom with a shattering cookie crust
- Perfect for: Game nights, bake sales, or high energy dessert cravings
Nothing wakes up a house like the aroma of cocoa and melted butter hitting a hot pan. These are my go-to for family game nights, the sort of treat that puts an end to any board game disputes as everyone focuses on grabbing another piece.
Precision is key here. You're aiming for a dense, fudgy brownie base capable of supporting the cookie topping without sinking. Incorrect ratios will lead to a texture that's too cakey.
Crafting these Oreo Chocolate Brookies is all about balancing two distinct doughs. One must remain a thick fudge, while the other provides a chewy crumb. Here is how to achieve that balance.
How Oreo Chocolate Brookies Stay Layered
Sugar Ratios: Using granulated sugar in the base creates that thin, crackly top, while brown sugar in the cookie layer adds moisture and chew. Serious Eats' research notes that brown sugar's acidity reacts with baking soda to create a different lift than white sugar.
Fat State: Melted butter in the brownies ensures a dense, fudgy texture. Softened butter in the cookie layer traps air, which keeps the top from becoming a brick.
Oreo Integration: Rough chopping the cookies provides structural "anchors" in the dough. This stops the chocolate chips from all sinking to the bottom of the Oreo Chocolate Brookies.
What Each Ingredient Does
| Component | Purpose | Substitute Notes |
|---|---|---|
| Unsalted Butter | Provides fat and structure | Salted butter: Reduce added salt by 1/4 tsp |
| Cocoa Powder | Primary chocolate depth | Dutch process: Darker color, milder taste |
| Brown Sugar | Moisture and chew | Maple sugar: Similar flavor, slightly different spread |
| Baking Soda | Chemical leavening | Baking powder: Use 2x amount, results in cakier texture |
Right then, let's look at the full list. Make sure your butter is in the right state, melted for the base, softened for the top.
Ingredients and Swaps
For the Brownie Base:
- 1/2 cup (115g) unsalted butter, meltedThe reason: Using melted butter ensures a fudgier, denser texture
- 1 cup (200g) white sugar
- 2 large eggs
- 1 tsp (5ml) vanilla extract
- 1/3 cup (35g) cocoa powder, unsweetened
- 1/2 cup (65g) all-purpose flour
- 1/4 tsp (1.5g) salt
For the Cookie Layer:
- 1/2 cup (115g) unsalted butter, softenedThe reason: Creaming softened butter provides a better cookie lift
- 1/2 cup (100g) packed brown sugar
- 1/4 cup (50g) granulated sugar
- 1 large egg
- 1 tsp (5ml) vanilla extract
- 1 1/4 cups (155g) all-purpose flour
- 1/2 tsp (3g) baking soda
- 1/2 tsp (3g) salt
- 3/4 cup (130g) semi-sweet chocolate chips
- 1 cup (100g) chopped Oreo cookies
| Original Ingredient | Substitute | Why It Works |
|---|---|---|
| All purpose flour | Almond flour | A gluten-free alternative. Note: Results in less structure and a denser crumb |
| Semi sweet chips | Dark chocolate chunks | Increases the cocoa percentage. Note: More intense flavor and less sugar |
| Oreo cookies | Chocolate wafers | Offers a similar crunch. Note: You'll miss the characteristic cream filling |
Because this recipe uses two different fat preparations, I highly recommend weighing your flour with a digital scale. Imprecise measuring is the most common pitfall when making these Oreo Chocolate Brookies.
Essential Tools for Precision
No professional equipment is necessary, though a few tools simplify the process. Stick to an 8x8 inch baking pan; using a 9x9 will result in thinner Oreo Chocolate Brookies that may overbake.
Parchment paper is essential. Ensure it hangs over the edges to make removing the cooled slab much easier. I also suggest a silicone spatula for folding in the Oreos, which helps prevent overworking the gluten.
A stand mixer like a KitchenAid is ideal for the cookie layer, but a hand mixer is just as effective. The most important part is beating the butter and sugar until fluffy.
Step-by-step Baking Process
Phase 1: Prepping the Foundation
Set your oven to 350°F (175°C). Fit an 8x8 inch pan with parchment paper, ensuring it hangs over the edges. Note: This keeps the bars from sticking and simplifies the slicing process.
Phase 2: Whipping the Brownie Base
Whisk the melted butter and granulated sugar in a large bowl until combined. Beat in the eggs and vanilla until the batter becomes glossy. Sift in the cocoa powder, flour, and salt. Gently fold with a spatula until just blended, then pour the mixture into the pan and level the top.
Phase 3: Folding the Cookie Dough
Cream together the softened butter, brown sugar, and granulated sugar in a medium bowl until light and fluffy. Blend in the egg and vanilla until creamy. Stir in the flour, baking soda, and salt. Carefully fold in the chocolate chips and crushed Oreos until evenly distributed.
Phase 4: Layering and Baking
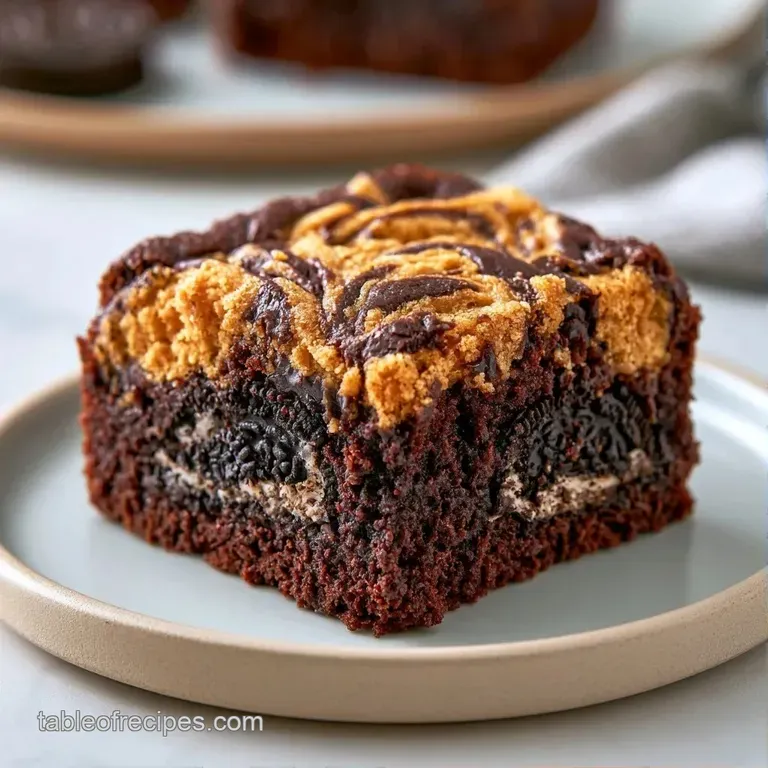
Drop spoonfuls of cookie dough over the raw brownie batter. Note: Avoid smoothing them out; these dollops create the signature peaks. Bake for 25 minutes until the cookie layer is golden brown and the center is set.
Let the pan cool for at least 30 minutes. If you slice them too soon, the fudgy center of the Oreo Chocolate Brookies will likely slide out.
Fixing Common Texture Issues
One of the biggest headaches is when the cookie dough just disappears into the brownie. This usually happens because the cookie butter was too warm. If the dough feels like soft frosting, pop it in the fridge for 10 minutes before scooping.
Another issue is the "cakey" brownie. This happens if you overbeat the eggs or use too much flour. Stick to the gram measurements to keep the Oreo Chocolate Brookies dense. For more on adjusting textures, you might like my Brookies in 55 Minutes recipe.
Preventing Cookie Sink
When the cookie layer sinks, it's a fat state problem. Chilling the dough firms the butter, which allows it to sit on top of the brownie batter during the first few minutes of baking.
Stopping the Over bake
Overbaking turns a fudgy brownie into a dry cake. Pull the pan when the edges are set but the center still has a very slight wiggle.
Managing the Spread
If the cookie layer spreads too thin, you likely over creamed the butter. Stop mixing as soon as the sugars are incorporated.
| Problem | Root Cause | Solution |
|---|---|---|
| Cookies sank | Butter too soft | Chill dough 15 mins before layering |
| Dry/Cakey base | Over mixing flour | Fold gently; stop at first sign of mixing |
| Greasy top | Oven temp too low | Use oven thermometer to verify 350°F |
Different Ways to Bake These
If you want to change the vibe, you can swap the standard Oreos for Golden Oreos. This adds a vanilla cookie note that cuts through the heavy chocolate. It's a great way to lighten up the Oreo Chocolate Brookies.
For a more intense chocolate experience, you can use a Dutch process cocoa powder. This gives the base a darker, more alkaline flavor. If you love that style, check out my cocoa brookies for another take.
You can also add a peanut butter swirl. Just microwave 2 tbsp of peanut butter for 15 seconds and swirl it into the brownie base before adding the cookies.
Decision Shortcut:
- Extra chew? → add 1 tbsp brown sugar
- More crunch? → use 1.5 cups Oreos
- Fudgier base? → underbake by 2 mins
Regardless of the tweak, keep the core ratios the same so the Oreo Chocolate Brookies don't lose their structure.
Keeping Your Bars Fresh
Keep your Oreo Chocolate Brookies in a sealed container. They will remain fresh on the counter for roughly 3 days. For a richer, fudgier texture, store them in the refrigerator; the chill solidifies the fats, giving the base a truffle-like consistency.
These are also freezer-friendly. Wrap each piece individually in plastic wrap before storing them in a freezer-safe bag. They stay good for 2 months. When ready to enjoy, allow them to thaw for one hour or heat them in the microwave for 10 seconds.
To prevent waste, stir any remaining chopped Oreos into your morning yogurt or sprinkle them over vanilla ice cream.
Best Drinks and Sides
Since Oreo Chocolate Brookies are so rich, they pair best with something that cuts through the sugar. A chilled glass of whole milk is the go-to, but a salted espresso also works wonders. The coffee's bitterness beautifully offsets the sweet Oreo cream.
If you are presenting these to guests, a dollop of unsweetened whipped cream on top is a great addition. It offers a light, airy contrast to the dense composition.
Some prefer serving a side of tart raspberry sorbet. The acidic berry flavor cleanses the palate between tastes of the Oreo Chocolate Brookies.
Fast vs Classic Approach:
| Feature | Fast (Melted Butter) | Classic (Creamed Butter) |
|---|---|---|
| Texture | Dense and fudgy | Lighter and cakier |
| Prep Time | Shorter | Longer |
| Stability | More moist | Holds shape better |
And that's the full process. Once you understand the role of temperature and fat states, making Oreo Chocolate Brookies is easy. Be sure to be patient during the cooling phase, or you'll have a pile of crumbs instead of neat squares. Enjoy your Oreo Chocolate Brookies!
Recipe FAQs
How to make a brookie with Oreo?
Pour brownie batter into the pan and scoop dollops of Oreo cookie dough on top.
Tip: Roughly chop the cookies to ensure even distribution of crunch.
Where should the cookie dough go in a brookie?
Place the cookie dough on top of the raw brownie batter.
Tip: Use a spoon to create small mounds rather than spreading the dough flat for better texture contrast.
Is it true you can bake brownies without baking paper?
No, and here's why. The high sugar content creates a sticky residue that bonds to the pan without a liner.
Tip: Grease the pan thoroughly with butter if you lack parchment paper.
What happens if you forget the baking soda in the cookie layer?
The cookie portions will stay dense and fail to rise during baking.
Tip: If you enjoy this denser texture, see how the same layering principle works in our ice cream sandwich dessert.
Oreo Chocolate Brookies in 45 Minutes