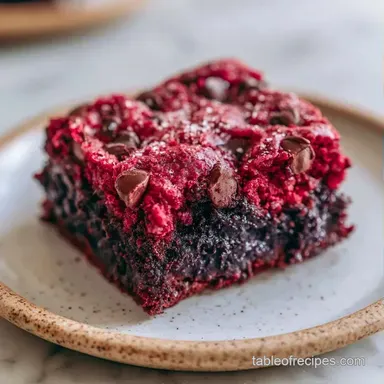
Red Velvet Brookie Bars in 1 Hour
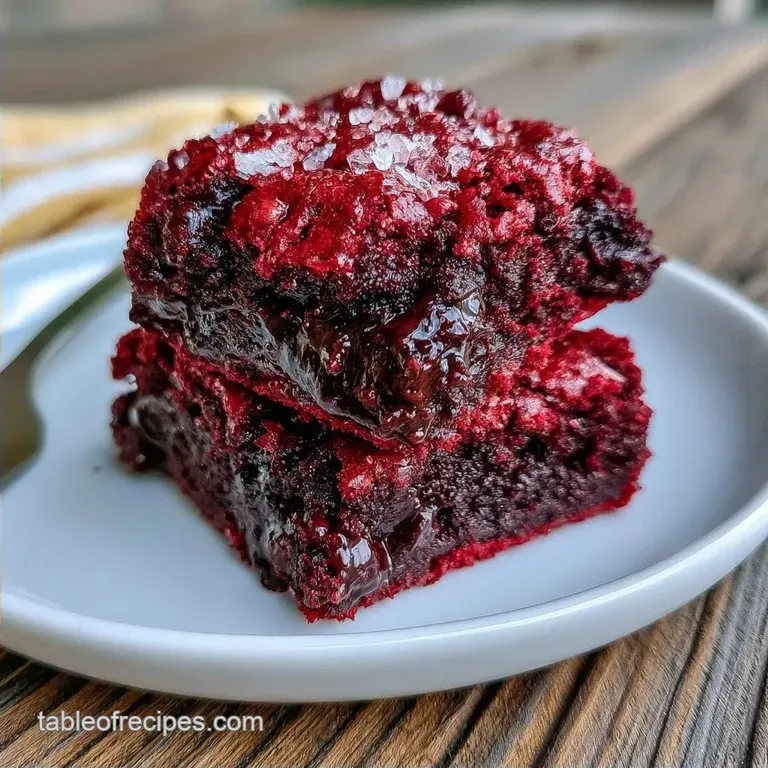
- Time: 25 minutes active + 40 minutes in oven
- The Highlight: A deep red fudgy layer topped with golden, chunky cookie swirls
- Perfect for: Dessert gatherings or an adventurous weekend project
That signature scent of vinegar and cocoa wafting through the kitchen is the first sign of a red velvet treat. In the past, I often struggled with this pairing, frequently producing a red velvet layer that felt more like a spongy rubber than a rich brownie.
It’s disappointing to crave a dense, indulgent bite and instead get something with the resilience of a tennis ball.
The issue typically stems from the reaction between cocoa and the leavening agents. Overworking the flour or neglecting the acidic component often strips away the fudgy center. To keep the cookie layer from sinking and turning the whole pan into a murky red-brown blur, these Brookie Bars require a touch of precision.
By optimizing the ratio of fat to flour and timing the mixing carefully, this recipe solves those common pitfalls. The result is a vivid crimson base and a chewy cookie top that sits perfectly on top. It's a striking dessert where both layers remain distinct and flavorful.
Red Velvet Brookie Bars Specs
Accuracy is essential here to properly balance the wet brownie batter with the firmer cookie dough. If the ratios aren't precise, the bars might not set, leaving you with a center that stays too gooey.
A 9x9 inch pan is the perfect size for these Red Velvet Brookie Bars. This ensures the layers are thick and decadent, yet bake evenly all the way through. Using a larger pan would result in a thinner layer, costing you that signature fudgy interior.
- 1. Oven Temperature
- Exactly 175°C (350°F).
- 2. Total Bake Time
- 30-35 minutes.
- 3. Cooling Window
- Minimum 30 minutes before slicing.
Why Most Recipes Fail
Most people treat red velvet like a standard chocolate cake, but it's actually a chemical reaction. Here is why these Red Velvet Brookie Bars actually work.
The Vinegar Cocoa Connection: The distilled vinegar reacts with the cocoa powder's alkalinity to create a lift and a specific tang. This prevents the base from becoming a dense brick and gives it that signature velvety texture.
Fat Stability: Using softened butter for the cookies instead of melted butter keeps the dough structured. This prevents the cookie layer from dissolving into the red velvet base during the bake.
Ingredients for these Bars
Your choice of cocoa is crucial here. I suggest using natural cocoa powder instead of Dutch-processed for the red velvet layer, as the acidity in the natural version interacts better with the vinegar. For the cookies, we're using a generous amount of brown sugar to achieve a chewy, molasses-infused finish.
For these Red Velvet Brookie Bars, you will need:
The Red Velvet Base
- 115g unsalted butter, meltedWhy this? Creates a dense, fudgy brownie consistency
- 200g granulated sugarWhy this? Offers a clean sweetness that doesn't overpower the cocoa
- 1 large egg (50g)Why this? Binds the mixture and adds richness
- 5ml vanilla extractWhy this? Softens the sharp tang of the vinegar
- 15ml red food coloringWhy this? Delivers the iconic deep crimson color
- 5ml distilled white vinegarWhy this? Reacts with the cocoa to create a lighter texture
- 30g unsweetened cocoa powderWhy this? Provides the essential chocolate base
- 125g all purpose flourWhy this? Gives the base its necessary hold
- 1.5g saltWhy this? Balances out the sugar
The Cookie Topper
- 115g unsalted butter, softenedWhy this? Key for a chewy cookie that doesn't spread too much
- 100g brown sugar, packedWhy this? Adds moisture and a rich caramel note
- 50g granulated sugarWhy this? Helps the edges become crisp
- 1 large egg (50g)Why this? Provides the needed lift and structure
- 5ml vanilla extractWhy this? Classic aromatic cookie flavor
- 155g all purpose flourWhy this? Builds the body of the dough
- 3g baking sodaWhy this? Assists with browning and rising
- 1.5g saltWhy this? Enhances the flavor of the chocolate chips
- 130g semi sweet chocolate chipsWhy this? Creates melty pockets of chocolate
- 100g Oreo cookies, roughly choppedWhy this? Adds a crunchy texture and visual appeal
Substitution Options
| Original Ingredient | Substitute | Why It Works |
|---|---|---|
| Unsalted Butter | Coconut Oil (refined) | Similar fat content. Note: May result in slightly softer bars |
| Granulated Sugar | Coconut Sugar | Works well, though the color will be darker and less vibrant |
| All purpose Flour | gluten-free 1:1 Blend | Maintains structure. Note: The crumb may be a bit more fragile |
| Semi sweet Chips | Dark Chocolate Chunks | More intense cocoa flavor and less sweetness |
Essential Baking Tools
While you don't need fancy equipment, a few specific tools will make crafting these Red Velvet Brookie Bars much simpler. A 9x9 inch square baking pan is a must. If you opt for a 9x13 rectangular pan, the layers will be too thin and you'll likely overbake the base.
Parchment paper is essential. I always leave an overhang on two sides so I can lift the entire slab of bars out of the pan once they've cooled. This is the best way to avoid "crumbling edges" and ensure you get a clean square cut.
For the red velvet layer, a silicone spatula is your best asset. You want to fold the dry ingredients in gently; using a whisk to beat the batter will develop too much gluten, which leads to that rubbery texture I mentioned earlier.
Bringing It Together
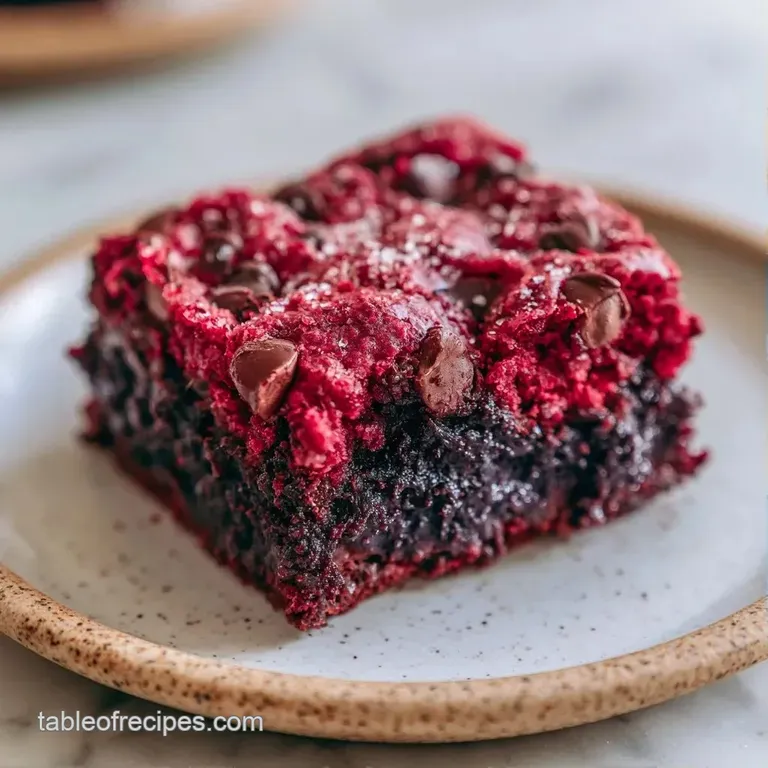
Time to get started. Think of these two layers as two separate recipes that just happen to be baked in the same dish.
Phase 1: The Red Base
- Set your oven to 175°C (350°F). Line a 9x9 inch pan with parchment paper, leaving a bit of an overhang.
- In a medium bowl, whisk 115g melted butter and 200g granulated sugar until well combined.
- Stir in the egg, vanilla, red food coloring, and vinegar, mixing until the batter is a consistent crimson shade.
- Sift 125g flour, 30g cocoa powder, and 1.5g salt into the mixture. Note: Sifting ensures the base remains free of cocoa lumps.
- Using a spatula, gently fold the ingredients together. Stop as soon as the flour streaks disappear.
- Pour the batter into the pan and use the back of a spoon to smooth it into an even layer.
Phase 2: The Cookie Topper
- Cream together 115g softened butter, 100g brown sugar, and 50g white sugar until the mixture is light and fluffy.
- Beat in the egg and vanilla until the texture is smooth and creamy.
- Stir in 155g flour, 1.5g salt, and 3g baking soda.
- Once the dough forms, fold in 100g chopped Oreo cookies and 130g chocolate chips.
Phase 3: Assembly and Baking
- Scoop the cookie dough into rounded tablespoons and arrange them evenly across the red velvet layer.
- Press the dough balls down slightly with your fingers. Note: Avoid flattening them completely so they keep some height.
- Bake on the center rack for 30-35 minutes until the edges pull away from the pan and the tops are golden brown.
- Take the pan out of the oven and let it cool completely for at least 30 minutes before lifting and slicing.
Troubleshooting Guide
When things go sideways with Red Velvet Brookie Bars, it's usually a result of temperature or mixing.
Fixing Sinking Centers
If your cookie dough disappears into the red velvet base, your base was likely too thin or your cookie dough was too soft. To fix this, make sure you use the "spoon and level" method for flour.
Scooping directly with a measuring cup packs the flour, but if you've under measured your base flour, it won't support the weight of the cookies. Also, ensure your cookie butter is softened, not melted.
Preventing Rubbery Texture
That rubbery bounce happens when the batter is overmixed. Once the flour hits the wet ingredients, gluten begins to form. If you whisk too aggressively, the gluten network becomes too tight. Stick to a spatula and a folding motion for the red velvet layer to keep the Red Velvet Brookie Bars tender.
Stopping Over Baking
Red velvet can dry out quickly because of the vinegar and cocoa. If the bars feel dry or crumbly, you've gone too far. Follow the same logic as King Arthur Baking’s cookie bar doneness advice : the center should still have a slight give when pressed, as it firms up during the 30 minute cooling window.
Dietary Adaptations
You can tweak these Red Velvet Brookie Bars to fit different needs, but keep in mind that swapping fats changes the texture.
For a gluten-free version, use a high-quality 1:1 almond based flour blend. Because these are dense bars, the difference is less noticeable than in a cake. However, you might find the bars stay softer for longer, so I recommend adding an extra 2 minutes to the bake time to ensure the center sets.
If you want to go dairy-free, use a refined coconut oil or a vegan butter stick. The Red Velvet Brookie Bars will still have that great contrast, though the cookie layer may spread a bit more. If you love this style of hybrid dessert, you might also like the Peanut Butter Brookie Bars for a salty sweet twist.
For a "Quick Start" shortcut, some people use a red velvet cake mix for the base. It works, but it's often much sweeter and lacks the deep cocoa punch of a scratch recipe. If you use a mix, reduce the extra sugar in the recipe by half to avoid a sugar overload.
Quick Decision Guide
- Extra tang? → Add 1/2 tsp lemon juice to the base.
- More crunch? → Increase Oreos to 12 cookies.
- Chewier top? → Use dark brown sugar instead of light.
Preservation Guidelines
To maintain the perfect balance between the chewy top and fudgy base, proper storage of these Red Velvet Brookie Bars is key.
Room Temperature: Keep in a tight-sealing container for up to 3 days. Avoid direct sun to prevent the red coloring from fading.
In the Refrigerator: Store in a sealed container for up to 7 days. I personally love them chilled, as the red velvet portion takes on a truffle-like texture. For guidance on food safety, refer to the FoodSafety.gov cold storage chart when preparing large dessert spreads.
In the Freezer: Wrap each bar in parchment paper and store in a zip-top bag for up to 3 months. To enjoy, thaw overnight in the refrigerator or pop one in the microwave for 15 seconds for a gooey finish.
Don't waste any extra cookie dough. Roll them into small balls and bake for 10 minutes as individual cookies. If you're looking for a different taste, give these Biscoff Brookie Bars a try.
Serving and Enjoying
The best way to serve Red Velvet Brookie Bars is by slicing them into small 2 inch squares. Because they are so rich, a smaller portion is usually more satisfying.
For a gourmet touch, serve a square slightly warmed in the microwave for 10 seconds. Top it with a dollop of cream cheese frosting or a sprinkle of flaky sea salt. The salt cuts through the sugar and makes the cocoa flavor pop.
If you're hosting a party, arrange them on a platter with fresh raspberries. The tartness of the berries complements the vinegar cocoa base perfectly. Alternatively, pair them with a cold glass of whole milk or a bitter espresso to balance the richness.
Why Most Recipes Fail
Many bakers struggle with layering these Red Velvet Brookie Bars. The most frequent error is the "mush factor," where the layers blend together. This typically occurs if the base is too wet or the cookie dough is overly oily.
Color is another common hurdle. Adding too much cocoa can transform the vivid crimson base into a dull brown. Using exactly 30g of cocoa alongside the red dye keeps the color striking without sacrificing the chocolate flavor.
Finally, avoid the temptation to slice the bars too soon. Cutting into them while they're still hot will cause the fudgy middle to ooze, compromising the bar's structure. That 30 minute cooling period is essential for getting a clean, professional finish rather than a crumbled mess.
Method Comparison
| Method | Workload | Result |
|---|---|---|
| Classic Scratch | Medium | Dense, rich, and balanced |
| Mix Based | Low | Airier crumb, very sweet |
You're now ready to get started. These Red Velvet Brookie Bars depend on the right balance of fat and acidity. Stick to the precise weights, be careful not to overmix the flour, and let them cool fully. Trust me, the result is a perfect, chunky bite that's worth the wait.
Recipe FAQs
Can I bake these without parchment paper?
No, use a liner. The sugars in the red velvet and cookie layers stick easily to the pan, making it nearly impossible to lift the bars out cleanly.
What happens if I omit the baking soda from the cookie layer?
The cookie top will be dense and flat. Without this leavener, the dough won't rise, resulting in a fudgy, thin layer. If you enjoyed mastering leavening ratios here, see how the same principle works in our pumpkin spice version.
Is it true that raw brownie batter is safe to eat?
That's a myth. Raw batter contains uncooked eggs and raw flour, both of which can carry bacteria like Salmonella or E. coli.
How to soften these bars once they go stale?
Microwave a single bar for 10-15 seconds. This briefly melts the butter and softens the sugars to restore the original texture.
Red Velvet Brookie Bars in 1 Hour