Old Fashioned Canned Blackberry Cobbler Filling
- Time: 20 min active + 30 min cook
- Flavor/Texture Hook: Tart, glossy, and thick
- Perfect for: Seasonal canning or family desserts
- Precise Guide to Blackberry Cobbler Filling
- How the Thickening Actually Works
- What Each Ingredient Does
- The Required Ingredient List
- Essential Kitchen Tools
- Step-by-Step Cooking Process
- Fixing Texture and Consistency
- Customizing Your Berry Mix
- Adjusting Your Batch Size
- Berry Baking Myths
- Storage and Waste Reduction
- Serving and Pairing Ideas
- Recipe FAQs
- 📝 Recipe Card
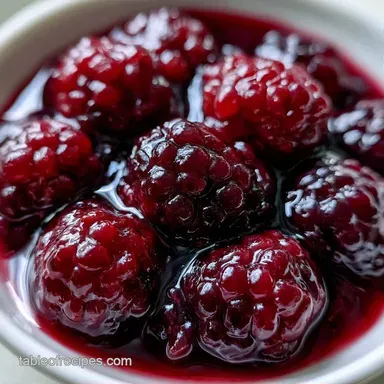
Precise Guide to Blackberry Cobbler Filling
The sound of blackberries popping in a heavy pot is the official start of August in my house. We usually gather on the porch, stained purple from the brambles, and start the slow process of turning those berries into something that lasts through December.
It's less of a casual jam and more of a calculated effort to capture that specific late summer tartness.
I've spent a lot of time obsessing over the viscosity of this mixture. If you just boil berries and sugar, you get a syrup that runs straight to the bottom of the crust, leaving you with a soggy base. This version uses a precise slurry method to ensure the fruit stays suspended in a thick, glossy glaze.
You can expect a filling that holds its shape when spooned out but still feels light on the tongue. This Blackberry Cobbler Filling isn't about guessing; it's about the exact moment the cornstarch hydrates and thickens the mixture.
How the Thickening Actually Works
- Starch Gelatinization: When the cornstarch slurry hits the boiling fruit, the starch granules swell and burst, trapping water and creating a stable network.
- Pectin Balance: Blackberries have natural pectin, but the addition of lemon juice lowers the pH, which helps the pectin bond and firms up the fruit.
- Sugar Hygroscopy: Sugar binds to the water in the berries, preventing them from releasing too much liquid during the bake.
| Fresh Made Filling | store-bought Shortcut | Impact on Result |
|---|---|---|
| Natural fruit pectin | Artificial thickeners | Fresh has a cleaner, brighter tartness |
| Adjustable sugar levels | High corn syrup content | Homemade is less cloying |
| Whole berry texture | Uniform fruit mush | Fresh berries provide better bite |
What Each Ingredient Does
| Ingredient | What It Does | Best Swap |
|---|---|---|
| Blackberries | Provides the base acid and bulk | Raspberries (more tart) |
| Cornstarch | Thickens the liquid into a gel | Arrowroot powder |
| Lemon Juice | Brightens flavor and sets pectin | Apple cider vinegar |
| Granulated Sugar | Preserves and balances acidity | Honey (reduces tartness) |
The Required Ingredient List
- 6 cups (900g) fresh blackberries, rinsed and patted dry Why this? Fresh berries have a better structure for canning
- 2 cups (400g) granulated sugar Why this? Standard sucrose ensures a predictable set
- 1 tbsp (15ml) lemon juice, freshly squeezed Why this? Necessary for pH balance and color
- 1/2 cup (64g) cornstarch Why this? Provides a stable, clear thickening agent
- 1/4 cup (60ml) cold water Why this? Prevents starch clumps in the slurry
- 1 tsp (5g) ground cinnamon Why this? Adds warmth without overpowering the fruit
- 1/4 tsp (1.5g) salt Why this? Enhances the natural berry sugars
- 1 tsp (5ml) vanilla extract Why this? Rounds out the sharp acidity
Essential Kitchen Tools
You'll need a large, heavy bottomed pot stainless steel is best because it doesn't react with the lemon juice. A silicone spatula is a must for stirring the berries without crushing them into a jam. For the canning process, have your sterilized pint jars, lids, and a wide mouth funnel ready.
A digital thermometer helps, but the "rolling boil" visual is the most reliable indicator here.
Step-by-step Cooking Process
- Combine the blackberries, sugar, lemon juice, cinnamon, and salt in your heavy pot.
- Heat over medium low, stirring gently with a spatula to keep the berries whole.
- Simmer for 10-15 minutes until the berries release their juices and smell fragrant.
- Whisk the cornstarch and cold water in a small bowl until the mixture is completely smooth.
- Drizzle the cornstarch slurry into the simmering berries while whisking constantly. Note: Slow addition prevents clumps
- Increase heat to medium high and bring to a full rolling boil for exactly 1 minute.
- Continue boiling until the filling is a heavy, silky syrup.
- Remove from heat and stir in the vanilla extract.
- Ladle the hot filling into sterilized pint jars, leaving 1/4 inch of headspace.
- Process the jars in a boiling water bath for 10 minutes, then let sit for 24 hours.
Fixing Texture and Consistency
The biggest issue people run into is a filling that feels too thin or separates. This usually happens when the slurry isn't boiled long enough. According to Serious Eats, cornstarch must reach a full boil to fully hydrate and activate its thickening properties. If you pull it off the heat too early, the starch remains raw and the sauce stays watery.
If the Filling is Too Runny
This is usually a timing error. If you've already removed it from the heat, you can return it to the stove and bring it back to a boil for another 30-60 seconds. Don't keep boiling it for minutes, or you'll break down the berries entirely.
If the Berries are Too Mushy
Over stirring is the culprit here. Use a folding motion with your spatula rather than a whisking motion until the final slurry stage. Once you add the starch, you have to whisk, but do it quickly.
If the Filling Separates
Separation occurs if the sugar wasn't fully dissolved or the temperature dropped too fast. Stirring in a small knob of cold butter at the very end can help emulsify the syrup.
| Problem | Root Cause | Solution |
|---|---|---|
| Watery syrup | Under boiled slurry | Boil for 1 full minute |
| Clumpy starch | Slurry added too fast | Whisk cold water first |
| Dull color | Overcooked fruit | Reduce simmer time to 10 min |
Customizing Your Berry Mix
If you're looking for something slightly different, you can lean into an Old Fashioned Canned Blackberry Cobbler Filling by adding a pinch of ground cloves. For those who prefer a mix, my berry cobbler filling approach works well if you want to swap half the blackberries for blueberries.
If you're using frozen fruit instead of fresh, be mindful that frozen berries release more water. You might need to increase the simmer time by 5 minutes to reduce the extra liquid before adding your slurry. I've detailed this more in my Cobbler with Frozen Berries recipe guide.
- For a Zesty Twist: Use lime juice instead of lemon.
- For Low Sugar Needs: Swap sugar for a 1:1 monk fruit blend, but note the set may be slightly softer.
- For a Spiced Version: Add 1/4 tsp of ground ginger for a sharp, clean heat.
Adjusting Your Batch Size
Scaling this recipe requires a bit of caution with the thickener. When doubling the batch (2x), don't double the cornstarch exactly. Use about 1.5x the amount of starch and liquid first, then check the consistency. Large volumes of fruit retain heat longer, which can lead to over thickening.
For a half batch, keep the ratios exactly the same. Use a smaller pot to ensure the liquid doesn't evaporate too quickly, which would leave you with a paste rather than a syrup. Reduce your simmer time by about 20% since the smaller mass of fruit reaches temperature faster.
Berry Baking Myths
Some people believe that you need to use "Clear Jel" to get a professional set. While Clear Jel is stable at higher temperatures, cornstarch works perfectly for home canning and baking if you follow the boiling rule.
Another common myth is that adding more sugar automatically makes the filling thicker. Sugar adds viscosity, yes, but it doesn't create a gel. Only the interaction between pectin and starch provides the structural "hold" needed for a cobbler.
Storage and Waste Reduction
Store your unopened jars in a cool, dark place for up to 12 months. Once opened, the Blackberry Cobbler Filling must be refrigerated and used within 10 days. If you have leftovers that didn't make it into a jar, freeze them in airtight containers for up to 6 months.
To avoid waste, don't toss the leftover berry bits at the bottom of your rinsing bowl. Simmer them with a bit of water and sugar to make a quick syrup for pancakes. If you have leftover lemon rinds from the juice, zest them and dry them in a low oven to use in future bakes.
Serving and Pairing Ideas
The classic choice is, obviously, a warm cobbler crust. I prefer a buttermilk biscuit topper that adds a salty contrast to the sweet berries. If you're in a rush, spoon the filling over a scoop of high-quality vanilla bean ice cream for a quick dessert parfait.
For a more sophisticated breakfast, swirl the filling into Greek yogurt and top with toasted almonds. Since this is effectively a Homemade Canned Blackberry Pie Filling, it also works as a layer in a cheesecake or a topping for lemon pound cake.
Just make sure to warm it slightly if it's been in the fridge so the texture becomes pourable again.
Whether you're making an Easy Canned Blackberry Cobbler Filling for a gift or prepping for a family reunion, the key is that one minute boil. Trust the timer, watch for the bubbles, and you'll have a consistent result every time.
This is easily the best canned blackberry pie filling you can make at home because you control the balance of acid and sugar.
Recipe FAQs
How to make blackberry cobbler filling from scratch?
Combine berries, sugar, lemon juice, cinnamon, and salt in a pot and simmer for 10 15 minutes. Whisk in a cornstarch slurry and bring to a rolling boil for one minute until glossy. Stir in vanilla extract before removing from heat.
Can you use canned fruit to make a cobbler?
Yes, canned fruit is a convenient shortcut. Simply pour the canned filling into your baking dish and top with your preferred batter or biscuit dough.
How to make a blackberry cobbler using canned filling?
Pour the canned filling into a baking dish. Cover with a cobbler topping and bake until the crust is golden brown. For a fresh twist, see how we balance tartness in our citrus blackberry version.
What can I make with a can of blackberry pie filling?
Use it as a base for cobblers, tarts, or cheesecake swirls. You can also stir it into yogurt or serve it warm over vanilla ice cream for a quick dessert.
How do I know when the filling is finished cooking?
Wait for the mixture to reach a full rolling boil for exactly one minute. The filling is ready when it transforms into a heavy, glossy syrup that coats the berries.
Is it true that you must crush the berries to thicken the filling?
No, this is a common misconception. Stirring gently with a spatula allows the berries to release juices and thicken via the cornstarch while remaining whole for better texture.
How to store homemade blackberry filling?
Ladle hot filling into sterilized jars and process in a boiling water bath for 10 minutes. Store unopened jars in a cool, dark place for 12 months, or refrigerate opened jars for up to 10 days.
Blackberry Cobbler Filling 2