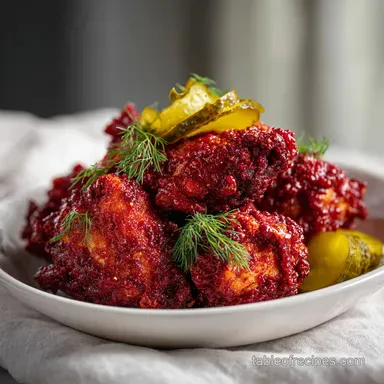
Nashville Hot Chicken: Authentic Cayenne Oil
- Time:30 mins active + 4 hours brining = Total 5 hours
- Flavor/Texture Hook: Shatter crisp skin with a velvety, spicy oil finish
- Perfect for: Weekend feasts, game day, or impressing friends who love heat
- The Most Authentic Nashville Hot Chicken Recipe with Cayenne Oil
- Reasons For This Recipe
- The Essential Components
- Necessary Kitchen Gear
- Step-by-Step Frying Guide
- Fixing Common Mistakes
- Troubleshooting Common Issues
- Flavor Twist Ideas
- Scaling Adjustments
- Debunking Common Myths
- Storage and Reheating
- Best Serving Methods
- Very High in Sodium
- Recipe FAQs
- 📝 Recipe Card
The Most Authentic Nashville Hot Chicken Recipe with Cayenne Oil
That first sound is everything, the aggressive sizzle as the breaded chicken hits the 350°F oil. Then comes the aroma, a heady mix of toasted flour and sharp cayenne that fills the entire house. I remember the first time I tried this at a spot in Tennessee, and I thought it was just spicy fried chicken.
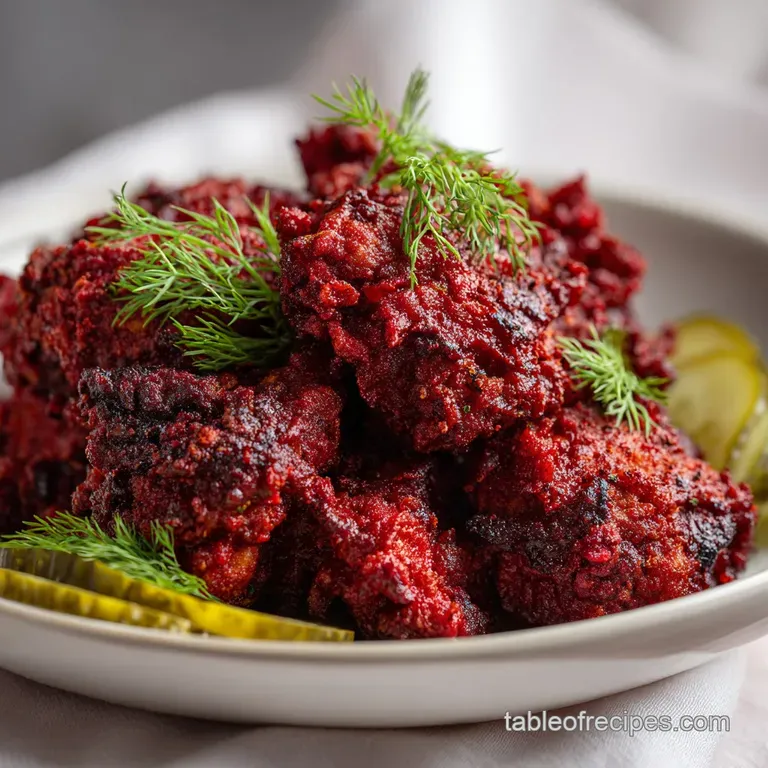
I was wrong. It is the glaze, that shimmering, deep red oil, that transforms the dish from standard comfort food into something visceral.
Forget the myth that you can just toss fried chicken in some hot sauce to get this result. Hot sauce is vinegar based and makes the breading soggy. To get it right, you need a fat based delivery system.
Learn how to make The Most Authentic Nashville Hot Chicken Recipe with Cayenne Oil to understand how the heat actually bonds with the crust.
This recipe isn't about being a pro chef, it's about using a few smart tricks to ensure the meat stays juicy while the outside stays crackling. We are going to use a buttermilk brine to tenderize the protein and a double dredge technique to create those little crags that hold onto the spicy oil.
Trust me, once you see those mahogany colored pieces emerging from the skillet, you'll never go back to basic fried chicken.
Reasons For This Recipe
The magic happens because we are treating the heat as a finish, not an ingredient in the batter. By infusing the frying oil with cayenne and butter, we create a coating that stays crisp. This method prevents the "soggy skin" syndrome that happens when people use water based sauces.
It's an efficient way to get maximum flavor without needing a commercial deep fryer.
One thing I've learned the hard way is that the brine is non negotiable. If you skip the 4 hour soak, you're just eating spicy meat. The buttermilk breaks down the tough fibers in the chicken breast or thighs, making them velvety inside. It's a low effort step that provides high impact results.
Right then, let's look at the specific details. This dish is a balance of heat and fat. The brown sugar in the oil glaze isn't there to make it "sweet," but to round out the sharp edges of the cayenne.
It creates a complex flavor profile that hits the back of your throat and then mellows out, leaving you wanting another bite.
The Secret To Success
Acidic Tenderizing: Buttermilk contains lactic acid which gently breaks down protein structures, ensuring the meat doesn't toughen during the over high heat fry.
Starch Synergy: Adding cornstarch to the flour prevents too much gluten from developing, resulting in a shatter crisp crust rather than a bready one.
Fat Based Heat: Using hot oil as the medium for the spices allows the cayenne to permeate the breading without adding moisture.
Texture Building: The double dredge creates "crags" or little ridges on the surface, which act as reservoirs for the spicy glaze.
| Thickness | Internal Temp | Rest Time | Visual Cue |
|---|---|---|---|
| 1 inch (Breast) | 165°F (74°C) | 5 mins | Clear juices, deep gold |
| 1.5 inch (Thigh) | 175°F (80°C) | 7 mins | Firm touch, mahogany skin |
| Tenders/Strips | 165°F (74°C) | 3 mins | Golden brown, crisp feel |
The Essential Components
When picking your ingredients, don't bother with low-fat alternatives. This is a budget friendly recipe, but the quality of the fat is what carries the heat. Use a neutral oil with a high smoke point.
If you use something like extra virgin olive oil, it will smoke and taste bitter before the chicken is even cooked through.
According to Serious Eats, brining is the single most effective way to ensure poultry remains moist during frying. That's why the buttermilk soak is so critical here. It's not just about flavor, it's about the structural integrity of the meat.
Component Analysis
| Ingredient | Science Role | Pro Secret |
|---|---|---|
| Buttermilk | Protein tenderizer | Use full fat for a more velvety interior |
| Cornstarch | Crispness enhancer | Keeps the crust from getting "bready" |
| Cayenne Pepper | Heat delivery | Toast it slightly in the oil for deeper flavor |
| Brown Sugar | Flavor balancer | Cuts the sharp acidity of the pepper |
Ingredients & Substitutes
For the Brine:
- 8 pieces chicken breast or thighs (approx. 3 lbs)Why this? Thighs are more forgiving and stay juicier
- 2 cups buttermilk (Substitute: Whole milk with 2 tbsp lemon juice
- Same acidity but less creamy)
- 1 tbsp kosher salt (Substitute: Table salt
- Use half the amount to avoid oversalting)
- 1 tbsp granulated sugar (Substitute: Honey
- Adds a floral note to the brine)
- 1 tsp cayenne pepper (Substitute: Paprika
- Much milder heat level)
- 1 tsp garlic powder (Substitute: Fresh minced garlic
- More pungent, less uniform)
For the Breading:
- 3 cups all purpose flour (Substitute: gluten-free 1:1 blend
- Works well, but slightly less "craggy")
- 1/2 cup cornstarch (Substitute: Rice flour
- Creates an even thinner, crispier shell)
- 1 tbsp paprika (Substitute: Smoked paprika
- Adds a wood fired aroma)
- 1 tbsp garlic powder (Substitute: Onion powder
- Changes the savory profile)
- 1 tbsp onion powder (Substitute: Garlic powder
- Similar savory depth)
- 1 tbsp kosher salt (Substitute: Sea salt
- Adds a slight mineral taste)
- 1 tsp black pepper (Substitute: White pepper
- More subtle, floral heat)
- 1 tsp cayenne pepper (Substitute: Chili powder
- Earthier, less sharp heat)
For the Cayenne Oil Glaze:
- 1/2 cup hot frying oil (Substitute: Lard
- Traditional, adds a rich, savory depth)
- 3 tbsp unsalted butter (Substitute: Ghee
- Higher smoke point, nuttier taste)
- 3 tbsp brown sugar (Substitute: Maple syrup
- Different sweetness, slightly thinner)
- 2 tbsp cayenne pepper (Substitute: Habanero powder
- Extremely high heat, use caution)
- 1 tbsp paprika (Substitute: Cayenne
- Increases heat, loses the red color)
- 1 tsp garlic powder (Substitute: Garlic salt
- Reduce salt in the recipe)
- 1/2 tsp kosher salt (Substitute: Celery salt
- Adds a classic "fried chicken" vibe)
Necessary Kitchen Gear
You don't need a fancy deep fryer. In fact, a heavy cast iron skillet is better because it holds heat more consistently. When you drop cold chicken into the oil, the temperature dips. A thick skillet recovers that heat faster, which prevents the chicken from absorbing too much oil and becoming greasy.
I usually use a Lodge cast iron skillet, but any heavy bottomed pot will work. The most important tool here is a digital meat thermometer. Guessing the internal temperature is how you end up with either raw chicken or dry, overcooked meat.
For the breading process, have a wire cooling rack and a baking sheet ready. If you let the chicken drain on paper towels, the bottom side will steam and lose its crunch. The wire rack allows air to circulate, keeping the crust shatter crisp on all sides.
| Tool | Purpose | Budget Alternative |
|---|---|---|
| Cast Iron Skillet | Heat retention | Heavy stainless steel pot |
| Meat Thermometer | Accuracy | Touch test (less reliable) |
| Wire Rack | Cooling | Oven rack over a tray |
| Large Mixing Bowls | Brining/Dredging | Plastic storage bins |
Step-by-step Frying Guide
Right then, let's get into it. This process is broken into phases. Don't rush the resting period, as that's when the breading actually "sets" and bonds to the meat.
Phase 1: The Moisture Lock
Whisk buttermilk, salt, sugar, cayenne pepper, and garlic powder in a large bowl. Submerge chicken pieces completely, cover, and refrigerate for 4 hours or overnight. Note: Overnight is better for deeper flavor penetration.
Phase 2: The Double Dredge
Whisk together flour, cornstarch, paprika, garlic powder, onion powder, salt, black pepper, and cayenne pepper in a second bowl. Remove chicken from brine, let excess drip off, and coat in the flour mixture. Dip back into buttermilk briefly, then dredge a second time in the flour, pressing firmly to create crags.
Note: Pressing the flour in creates those signature ridges.
Phase 3: The Setting Period
Rest the breaded chicken on a baking sheet for 15 minutes to ensure the coating adheres. Note: This prevents the crust from sliding off in the oil.
Phase 4: The Fry
Heat 2 inches of oil in a cast iron skillet to 350°F (175°C). Fry chicken in batches until the internal temperature reaches 165°F (74°C) and the exterior is deep golden brown. Drain on a wire rack. Note: Don't overcrowd the pan or the oil temp will crash.
Phase 5: The Hot Oil Dip
Whisk together reserved hot frying oil, melted butter, brown sugar, cayenne pepper, paprika, garlic powder, and salt. Brush the mixture generously over the top of each piece of hot fried chicken. Note: Use a brush for an even coat, or dip the chicken directly.
Fixing Common Mistakes
The most common issue people have with this recipe is the breading falling off. This usually happens because the chicken was too wet when it hit the flour, or they skipped the resting period. The resting period allows the flour to hydrate and form a "glue" with the buttermilk.
Another problem is the oil tasting bitter. This happens if the oil is overheated or if the spices in the glaze are burnt. Make sure you're using a thermometer and not just guessing the heat based on a bubble test.
Troubleshooting Common Issues
| Issue | Solution | |||||
|---|---|---|---|---|---|---|
| Why Your Breading is Slipping | If the crust separates from the meat, it's usually due to a lack of adhesion. Ensure you're pressing the flour firmly into the chicken during the second dredge. | |||||
| Why Your Chicken is Greasy | Greasy chicken is almost always a result of oil temperature dropping too low. If you put too many pieces in at once, the temp crashes, and the chicken absorbs oil instead of searing. | |||||
| Why the Glaze is Too Spicy | Cayenne varies in potency. If the oil is too hot for your palate, don't add water. Instead, whisk in an extra tablespoon of melted butter to mellow the heat. | Problem | Root Cause | Solution |
Quick Fix Checklist
- ✓ Pat chicken slightly before the first dredge if it's dripping.
- ✓ Preheat oil for 5-10 minutes to ensure a stable temperature.
- ✓ Work in batches - keep the oil at a steady 350°F.
- ✓ Use a wire rack, never paper towels, for the initial drain.
- ✓ Brush the glaze on while the chicken is still piping hot.
Flavor Twist Ideas
If you're feeling adventurous, you can tweak the cayenne oil. I personally love adding a teaspoon of smoked paprika to the glaze for a wood fired flavor. It doesn't change the heat but adds a layer of complexity that makes the dish feel more "artisanal."
For those who want a sweet heat kick, replace the brown sugar with honey or maple syrup. This creates a stickier glaze that pairs beautifully with a cold coleslaw. If you enjoy other savory combinations, you might like my Mushroom Swiss Burger recipe for a different kind of comfort food.
You can also vary the protein. While thighs are the gold standard, chicken breast works well if you keep the brine time strictly to 4 hours to avoid a mealy texture. For an even lighter version, try using chicken tenders, though you'll need to reduce the frying time significantly.
The Ultimate Sandwich Setup
To turn this into a sandwich, toast a brioche bun with plenty of butter. Add a thick slice of dill pickle and a swipe of creamy Alabama white sauce or regular mayo. The acidity of the pickle cuts through the richness of the cayenne oil perfectly.
Smoky Heat Variant
Substitute half of the cayenne in the glaze with chipotle powder. This gives you a deeper, earthier heat that tastes like it came off a grill. It's a great way to bridge the gap between Nashville style and Tex Mex.
Scaling Adjustments
When you're cooking for a crowd, the biggest mistake is trying to double the batch in one pan. You cannot scale up the frying process without adding more equipment. If you have 16 pieces of chicken, use two skillets or work in four small batches.
For the brine and breading, you can easily double or triple the ingredients. However, be careful with the salt. When scaling spices, I recommend only increasing the salt and cayenne to 1.5x for a double batch. You can always add more heat at the end with the glaze, but you can't take it away once it's in the brine.
If you're cooking for just one or two people, you can halve the recipe. Just be mindful that the oil volume needs to remain deep enough (about 2 inches) to allow the chicken to float. If the oil is too shallow, you'll end up with "pan-fried" chicken rather than "deep fried" chicken. If you're looking for other chicken ideas that are easier for meal prep, my Crockpot Salsa Chicken recipe is a great alternative.
| Batch Size | Flour/Brine Adjustment | Oil Volume | Cook Time Change |
|---|---|---|---|
| Half (4 pcs) | 50% of all ingredients | Keep 2 inches deep | No change per piece |
| Double (16 pcs) | 1.5x Salt/Cayenne, 2x others | Use 2 pans | Increase total time |
| Party (32 pcs) | 1.5x Salt/Cayenne, 2x others | Commercial fryer | Work in batches |
Debunking Common Myths
One big misconception is that you need a commercial deep fryer to get that "restaurant crunch." That's just not true. A cast iron skillet actually provides a more consistent sear because of its thermal mass. As long as you have a thermometer, the skillet is superior for home cooks.
Another myth is that the "hot" part of Nashville Hot Chicken comes from the breading. In reality, the breading is just seasoned for flavor. The actual heat is delivered via the oil glaze.
If you put all the cayenne in the flour, the spices often burn during the fry, leaving you with a bitter taste rather than a spicy one.
Finally,, some people think you should fry the chicken at the highest temperature possible to "seal in the juices." This is a total lie. Searing doesn't seal anything. Frying too hot just burns the outside while leaving the inside raw. Stick to 350°F for that perfect mahogany glow.
Storage and Reheating
Leftovers are a bit tricky with fried chicken because the moisture in the fridge softens the crust. Store your chicken in an airtight container with a piece of paper towel at the bottom to absorb excess moisture. It will stay good in the fridge for 3 to 4 days.
For freezing, I don't recommend freezing the glazed chicken. The oil can separate and make the meat taste "fishy" upon thawing. If you must freeze it, freeze the fried chicken before applying the cayenne oil. Wrap each piece tightly in foil and store in a freezer bag for up to 2 months.
To reheat, avoid the microwave at all costs. The microwave turns the crust into a sponge. Instead, use an air fryer or oven. Preheat your oven to 375°F (190°C), place the chicken on a wire rack, and heat for 10-15 minutes. This recrisps the breading and awakens the spices in the oil.
Zero Waste Tips
Don't throw away the leftover buttermilk brine! You can use it as a tenderizer for pork chops or as a base for a spicy pancake batter the next morning. If you have leftover flour dredge, discard it for safety reasons, as it has come into contact with raw chicken.
Best Serving Methods
The most authentic way to serve this is on a slice of thick cut white bread. The bread acts as a sponge, soaking up the excess cayenne oil that drips off the chicken. This is the best part of the meal, honestly.
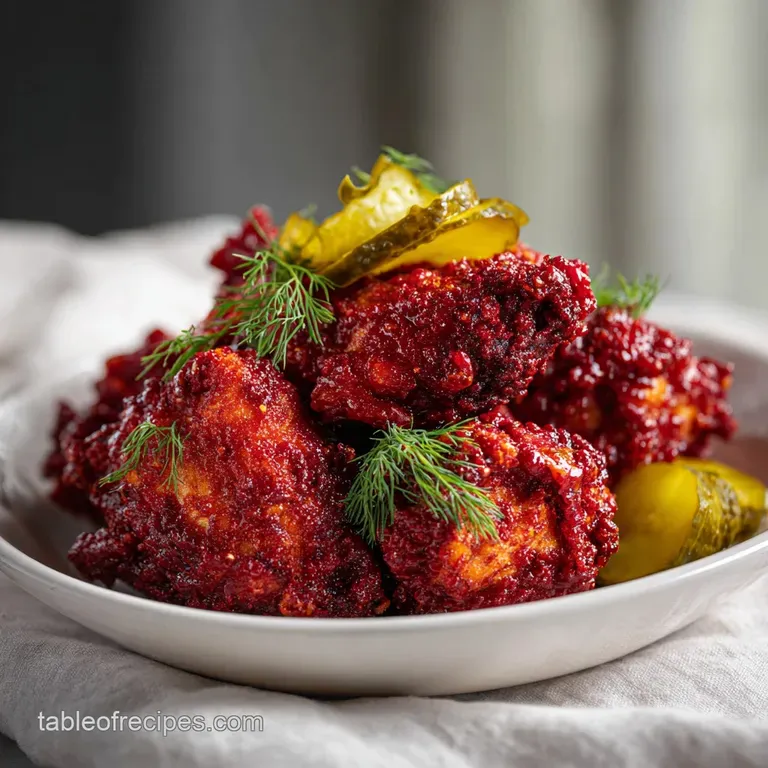
Pair the chicken with something cold and acidic to balance the heat. A creamy coleslaw with a vinegar base or some sliced dill pickles are mandatory. The acidity cleanses your palate between bites, allowing you to experience the heat again and again without it becoming overwhelming.
For a full meal, serve it with honey butter cornbread or a side of macaroni and cheese. The sweetness of the cornbread and the creaminess of the cheese provide a perfect counterpoint to the sharp, spicy punch of the Nashville hot oil.
Just remember to keep a glass of cold milk or a sweet iced tea nearby, because this recipe doesn't play around with the heat.
Very High in Sodium
1850 mg 1,850 mg of sodium per serving (80% 80% of daily value)
The American Heart Association recommends a daily sodium limit of no more than 2,300 mg, with an ideal limit of 1,500 mg for most adults to reduce cardiovascular risk.
Tips to Reduce Sodium
-
Reduce Breading Salt-25%
Cut the 1 tbsp of kosher salt in the flour mixture by half or replace it with a salt free seasoning blend.
-
Minimize Marinade Salt-25%
Reduce the 1 tbsp of kosher salt in the buttermilk marinade; the buttermilk itself already contains natural sodium.
-
Omit Glaze Salt-10%
Remove the 1/2 tsp of kosher salt from the butter and brown sugar glaze, as the sweetness provides sufficient flavor contrast.
-
Low-Sodium Buttermilk-5%
Substitute standard buttermilk with low-sodium buttermilk or a DIY version using milk and lemon juice.
-
Enhance Natural Spices
Increase the paprika, garlic powder, and black pepper to build a bolder flavor profile without relying on salt.
Recipe FAQs
Why is my breading slipping off the chicken?
Press the flour mixture firmly into the meat during the second dredge. This creates a stronger bond between the coating and the chicken, preventing the crust from separating during frying.
Why did my chicken turn out greasy?
Fry in small batches to maintain a constant oil temperature of 350°F (175°C). Overcrowding the skillet causes the temperature to crash, which forces the chicken to absorb oil rather than sear.
Is it true that resting the breaded chicken before frying is unnecessary?
No, this is a common misconception. Resting the chicken on a baking sheet for 15 minutes allows the breading to set and bond to the meat, ensuring a crispier, more stable crust.
How to brine the chicken for the best flavor?
Whisk buttermilk, salt, sugar, cayenne, and garlic powder in a large bowl. Submerge the chicken pieces completely and refrigerate for at least 4 hours or overnight.
What should I do if the cayenne oil glaze is too spicy?
Increase the amount of melted butter or brown sugar in the glaze. Because cayenne potency varies by brand, adding more fat or sweetness helps balance the heat to your preference.
Can I freeze the chicken after applying the cayenne oil?
No, avoid freezing the glazed chicken. The oil can separate during the thawing process and create an unpleasant "fishy" taste; freeze the chicken before applying the glaze instead.
What is the best way to serve this dish?
Serve immediately on white bread with pickle slices. If you enjoyed mastering the bold flavor layering technique here, see how we apply similar savory spicy balances in our breakfast burritos.
Authentic Nashville Hot Chicken